Oh, hello, my dear friends! Welcome back into my kitchen. Pour yourself another cup of coffee or hot chocolate because today, we are diving headfirst into the coziest, most delightful recipe to hit your holiday rotation: No-Bake Gingerbread Bars.
I know what you’re thinking: gingerbread usually means rolling, cutting, and an oven timer glued to your gaze. But this recipe? This is a weeknight wonder, a holiday secret weapon, and the absolute easiest way to bring that iconic, warm spice of the season into your home. Seriously, you can have these bars prepped and chilling in the fridge in about fifteen glorious minutes. That’s pure, unadulterated kitchen magic.
If you’re new here, let me just say thank you for spending a few moments of your busy day with me. I’m Victoria—mom, home cook, and the heart behind Moms Meals Daily. 💛 I was born and raised in a cozy, food-loving family where meals weren’t just about eating—they were about connection, comfort, and creating memories. From a young age, I found joy in the kitchen, helping my mom whip up simple, nourishing meals that brought everyone to the table. While my life has taken many twists and turns, one thing has always remained constant: my love for food and family. That love grew even stronger when I became a mom myself. Between juggling little ones, busy days, and the never-ending “What’s for dinner?” question, I realized I needed meals that were easy, nourishing, and real—and I knew other moms did too. That’s how Moms Meals Daily was born: out of a passion for sharing doable, everyday recipes that bring joy without the stress. My husband, my best friend, is my biggest fan and favorite taste-tester. Welcome to my kitchen! 🍽️✨
The moment you pull these No-Bake Gingerbread Bars out of the fridge, the scent of fresh ginger and cinnamon will fill your entire home, whispering the joy of the holidays. Trust me when I say you will make this recipe year after year. Now, let’s get started!
Table of Contents
Overview of Recipe Content
These No-Bake Gingerbread Bars are truly a triumph of winter baking—or, rather, non-baking. They combine a richly spiced, buttery gingersnap crust with a dreamy, cloud-like layer of cream cheese frosting.
What They Are and When to Serve Them At their heart, these are a decadent, chewy, and intensely flavorful dessert bar. We use pre-made gingersnap cookies as the foundation, which gives us that perfect crunch and spicy base without turning on the oven. You can serve them at virtually any festive gathering: a school holiday party, a cookie exchange, Christmas Eve, or just a Tuesday night when you crave something special. They are a marvelous addition to any holiday platter because they slice cleanly and hold their shape beautifully.
Why You Will Love This Recipe You will love how ridiculously easy these bars are. The active time is genuinely less than 15 minutes. They are also incredibly forgiving; you cannot mess this up. The flavors are deep, warm, and inviting, providing the perfect balance of intense holiday spice and creamy, tangy sweetness. It’s the ultimate crowd-pleasing dessert that frees up your precious oven space for other holiday feasting.
What They Taste Like Imagine the warmest, chewiest gingerbread cookie you’ve ever had, then multiply the flavor and give it a fudge-like texture. The crust carries deep notes of ginger, molasses, and cloves. We intensify that base with extra ground ginger and cinnamon to make the spice sing. The thick, white frosting cuts through the richness, offering a bright, slightly tangy contrast that keeps you reaching for another square. The texture is a delightful combination: a slight chew from the cookie base followed by the smooth, melt-in-your-mouth frosting.
Health or Seasonal Benefits While this is a decadent holiday dessert, the spices—ginger, cinnamon, and cloves—are full of natural goodness and have been used for centuries for their warming and comforting properties. They truly capture the essence of the winter season. These bars are a comforting, soul-nourishing treat, perfect for the chilliest months.
Ingredients
We are keeping this list super simple and pantry-friendly. You will likely have most of these ingredients already waiting in your cupboard!
For the Spiced Gingersnap Crust
- 2 ½ cups (about 12 ounces) Gingersnap Cookies: Use your favorite brand! Make sure they are crisp and full of flavor.
- ½ cup (1 stick) Unsalted Butter, melted: We need this butter to bind the crumb mixture into a solid crust.
- ¼ cup Light Brown Sugar, packed: Adds a little extra moisture and a deeper, caramelized flavor to the base.
- 2 tablespoons Molasses: This is the secret ingredient that makes the crust taste like homemade gingerbread dough. Use robust, dark molasses, not blackstrap.
- 1 teaspoon Ground Ginger: We boost the ginger flavor, bringing that fiery warmth to the crust.
- ½ teaspoon Ground Cinnamon
- ¼ teaspoon Ground Cloves
For the Luscious Cream Cheese Frosting
- 8 ounces Cream Cheese, softened: Leave this out on the counter until it’s super soft—this prevents lumps!
- ½ cup (1 stick) Unsalted Butter, softened
- 4 cups Powdered Sugar, sifted: Sifting prevents lumps and gives you the smoothest frosting imaginable.
- 1 teaspoon Vanilla Extract: Use the real stuff!
- Pinch of Salt: A must-have to balance the sweetness.
- Optional Garnish: Additional ground cinnamon or a sprinkle of sanding sugar.
Tools Needed
- 9×13-inch baking pan: This size works perfectly for a crowd.
- Parchment paper: Line the pan with an overhang for easy removal—it makes the process an absolute breeze.
- Food Processor: The easiest way to crush the cookies into fine crumbs. If you don’t have one, place the cookies in a freezer bag and let the kids smash them with a rolling pin!
- Electric Mixer: A hand mixer or stand mixer is ideal for achieving that fluffy, dreamy cream cheese frosting.
Substitutions and Additions
This recipe is flexible, so make it your own!
- For the Gingersnap Cookies: Swap them out for Biscoff cookies or even graham crackers for a different spin. If you use less-spiced cookies, increase the ground ginger and cinnamon in the crust mixture to a full 2 teaspoons total.
- Dairy-Free Option: Use vegan butter sticks and a dairy-free cream cheese alternative. The texture may be slightly softer, but the flavor will still be phenomenal.
- Spice it Up: Add a tiny pinch of black pepper or cardamom to the crust mixture for an unexpected, zingy complexity. My nonna always said a secret ingredient is the best ingredient!
- Zest: Grate in 1 teaspoon of fresh orange zest into the frosting—it brightens up the flavor beautifully and offers a festive aroma.
- Toppings: After the bars chill, press on some finely chopped candied ginger, sprinkle with toffee bits, or drizzle with a little melted white chocolate.
How to Make No-Bake Gingerbread Bars
You are going to be thrilled by how quickly these come together. We are moving in an active voice here, so let’s get that butter melted!
Step 1: Crush the Cookies and Mix the Crust
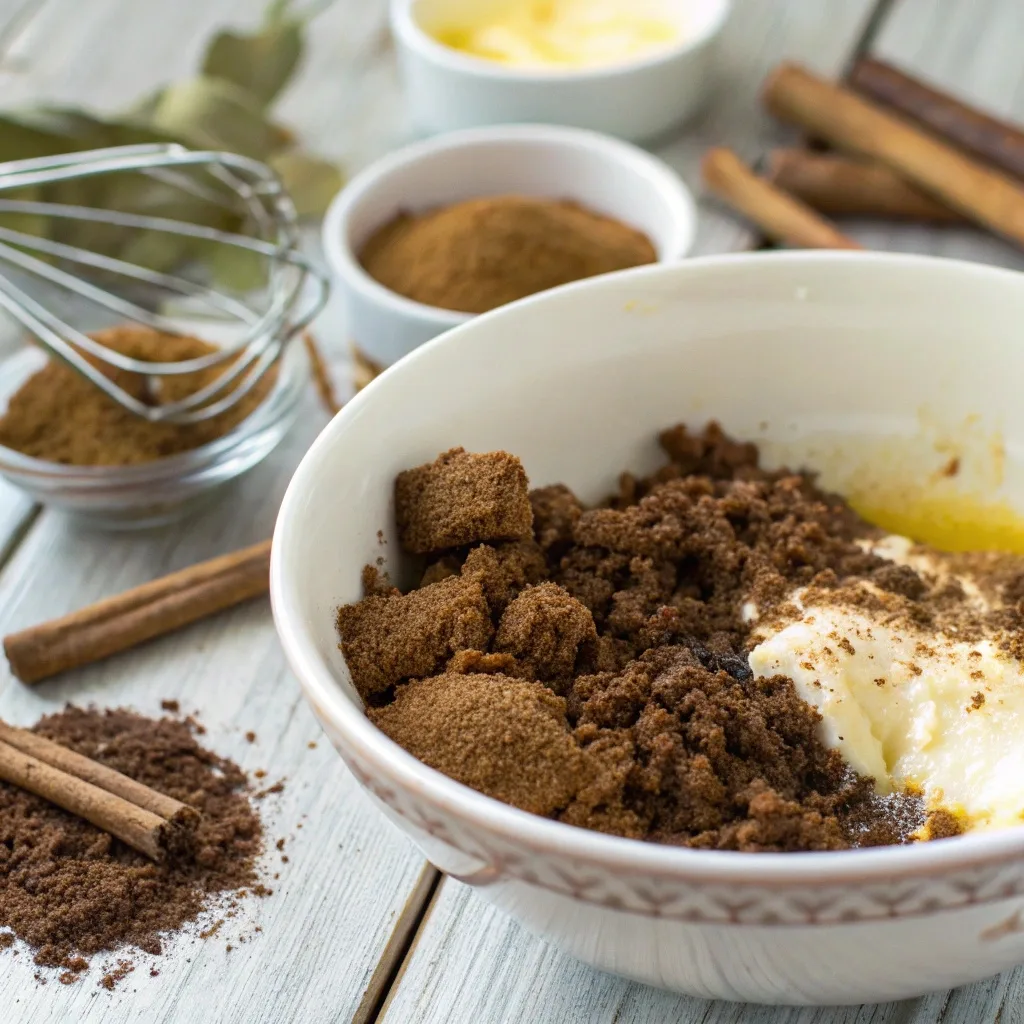
First, gather all your ingredients. Take your gingersnap cookies and pulse them in your food processor until they form fine, even crumbs. If you’re smashing them by hand, aim for the texture of coarse sand. You don’t want big chunks!
Next, melt the butter until it is liquid gold. In a large mixing bowl, combine the crushed gingersnap crumbs, the melted butter, brown sugar, molasses, ground ginger, cinnamon, and cloves. Use a wooden spoon to thoroughly mix everything. You should end up with a moist mixture that holds together when you squeeze it. The molasses and spices will release their intoxicating aroma right away—that’s how you know you’re doing it right!
Step 2: Press the Crust
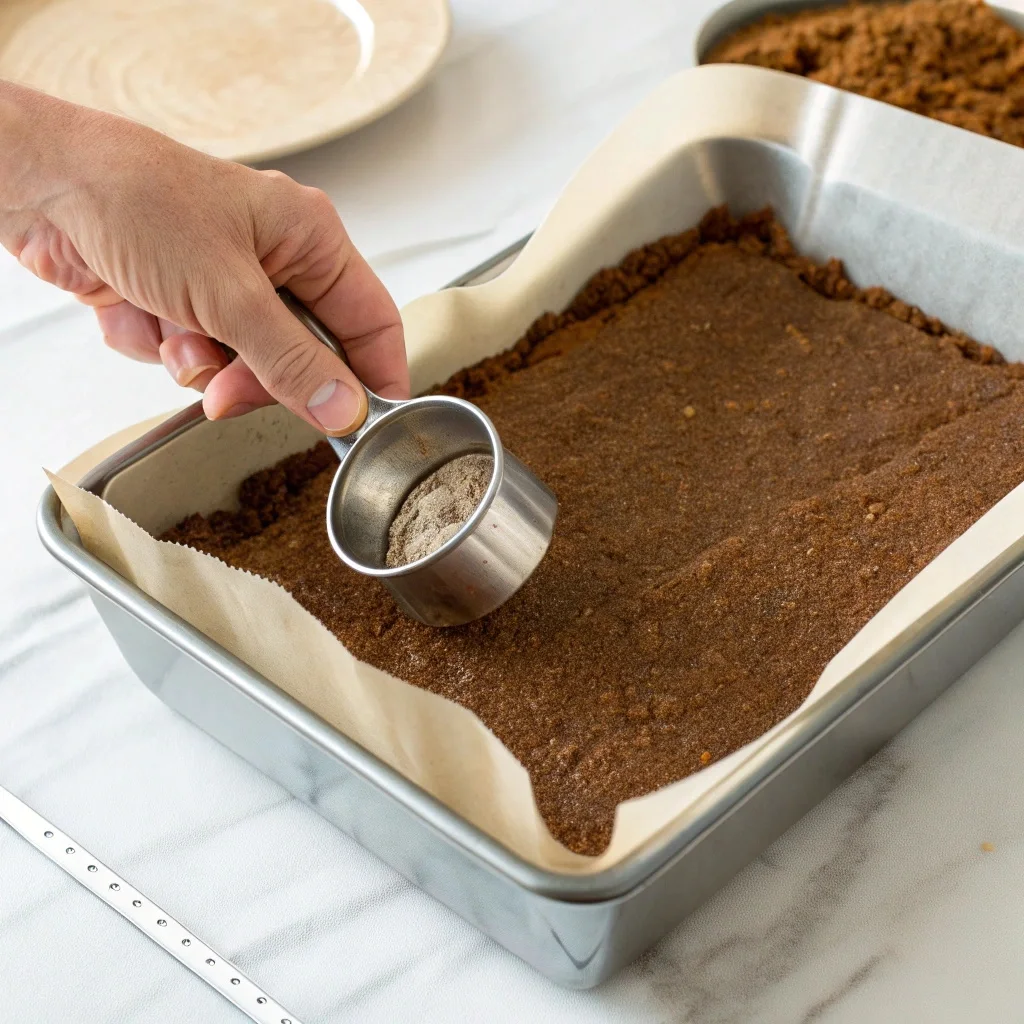
Line your 9×13-inch pan with parchment paper, leaving an overhang on the two long sides. This paper is our little escape route for easy slicing later.
Press the crumb mixture firmly and evenly into the bottom of the prepared pan. I like to use the bottom of a measuring cup to really compact the crust. The firmer you press it, the less crumbly your final bars will be. Pop this crust into the freezer while you prepare the frosting—about five minutes of chill time is all we need!
Step 3: Whip Up the Sensational Frosting
Now for the crowning glory! Ensure your cream cheese and butter are perfectly softened. This is key to a smooth, lump-free frosting.
In your mixer bowl, beat the cream cheese, softened butter, and a pinch of salt on medium speed until the mixture is incredibly light and fluffy—about three minutes. Scrape down the sides of the bowl to make sure everything incorporates.
Reduce the speed to low and gradually add the sifted powdered sugar, one cup at a time. This keeps the sugar from flying all over your kitchen! Once all the sugar is in, pour in the vanilla extract and beat on medium speed for one final minute until the frosting is voluminous and velvety. Don’t over-beat it, or it will become too soft.
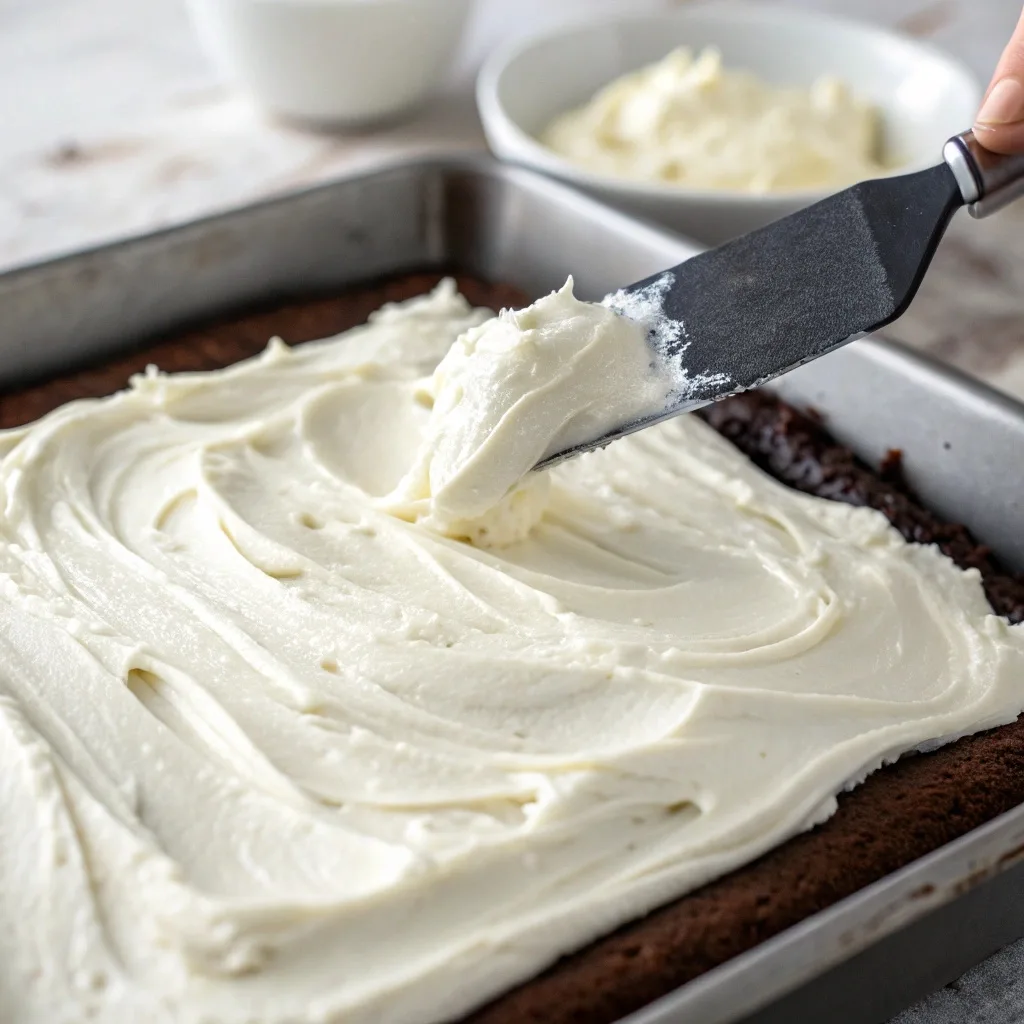
Step 4: Assemble and Chill
Retrieve the chilled crust from the freezer. Using an offset spatula, or the back of a spoon, spread the luscious cream cheese frosting evenly over the crust. Take your time here; a steady hand makes for a beautiful, flat top.
Once the frosting is smooth, it’s time for the hardest part: waiting! Cover the pan lightly with plastic wrap and place it back in the refrigerator. The bars need at least 2 hours to chill and firm up. This time allows the crust to set, making the bars incredibly easy to slice. I usually make them right after the kids go to bed so they are perfectly ready for a midday treat the next day.
Step 5: Slice and Serve
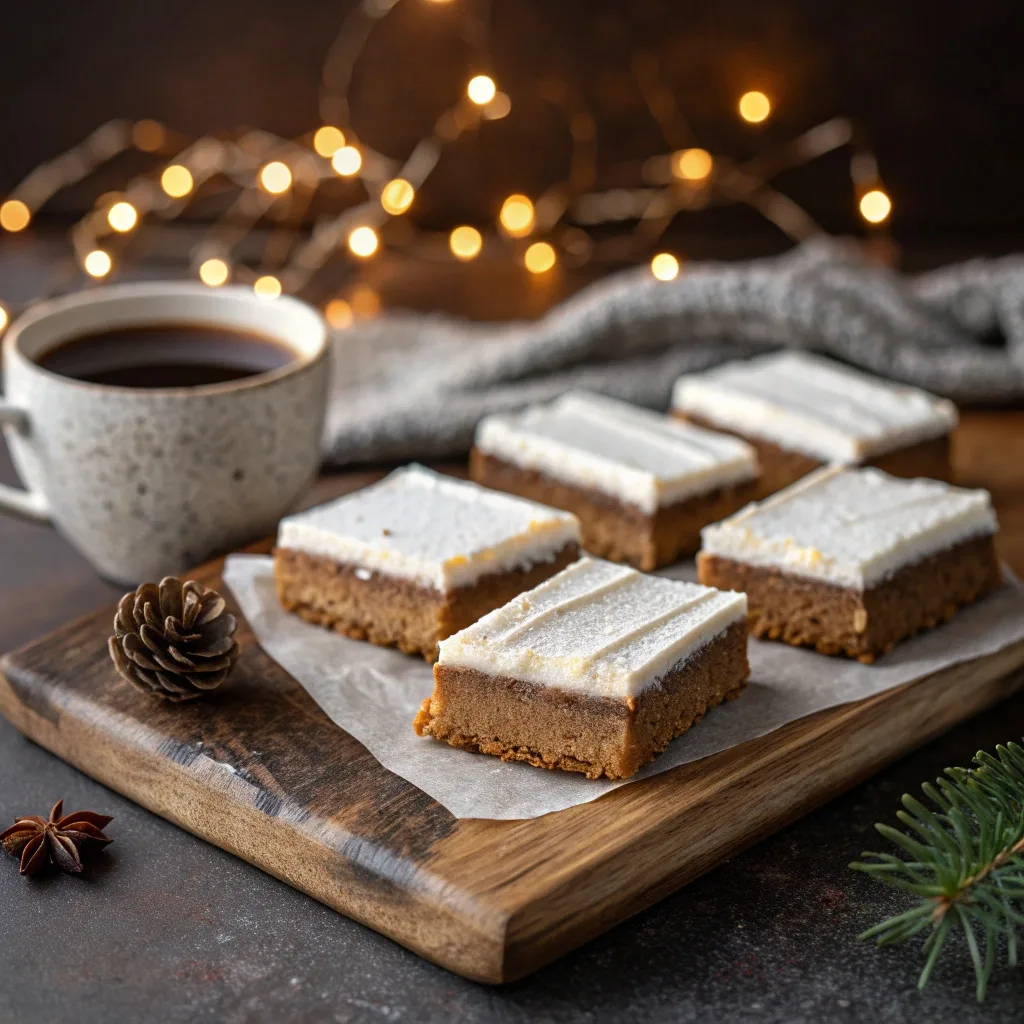
When the bars are completely firm, grab that parchment paper overhang and lift the entire slab out of the pan. Place it on a cutting board. I find a large, sharp knife dipped in hot water and wiped dry between cuts gives you the cleanest edges. Cut into 16 generous squares, garnish with a light dusting of cinnamon, and watch them disappear!
What to Serve with No-Bake Gingerbread Bars
These bars are incredible on their own, but they really shine when paired with the right company. Think cozy, warming, and comforting!
- The Perfect Beverage Pairing: Nothing complements the warmth of ginger and molasses like a creamy, hot drink. Serve these bars with a steaming mug of strong, rich black coffee or a velvety vanilla Chai latte. For the kids (or the kid in you!), a glass of cold milk or a big mug of homemade hot cocoa is the ultimate treat.
- A Scoop of Something Cool: The contrast of temperature is divine. A scoop of high-quality vanilla bean ice cream or a dollop of fresh, lightly sweetened whipped cream next to the bar creates a truly decadent experience.
- Fruit for Contrast: Cut the richness with something bright. A small side of fresh raspberries or a drizzle of tart lemon curd offers a beautiful, unexpected counterpoint to the spice.
Tips for Making It Perfect
You are practically a pro already, but a few simple tips will make these No-Bake Gingerbread Bars absolutely unforgettable.
- Mind the Cream Cheese Temperature: I’m kicking myself for not photographing my lumpy frosting disaster from a few years ago! It taught me a valuable lesson: if your cream cheese is even slightly cool, the frosting will turn out lumpy. Plan ahead and let both the cream cheese and butter sit at room temperature for at least an hour. They should yield easily to gentle pressure.
- The Power of Molasses: Don’t skip the molasses in the crust! It’s what transforms the crushed cookies from a plain crust into a rich, deep, authentic gingerbread flavor. If you want an even deeper, more complex note, use dark brown sugar instead of light.
- Sift the Sugar, Seriously: Powdered sugar clumps when stored. Sifting it is the key to that silky-smooth frosting texture we are aiming for. If you don’t sift, you’ll be fighting tiny sugar lumps forever.
- Clean Cuts Every Time: I mentioned the hot knife trick, and it’s so important I’ll repeat it! Before slicing, run your knife under hot water, wipe it clean and dry, and then make a long, clean cut. Repeat this step for every single cut for gorgeous, bakery-worthy edges.
Storage Instructions
These bars are an ideal make-ahead dessert because they actually get better after a day or two in the fridge, allowing the crust to soften and the spices to deepen.
- How to Store: Keep the bars in an airtight container in the refrigerator for up to 5 days. Since they contain cream cheese frosting, they cannot stay at room temperature for long.
- How to Freeze: These are fantastic for freezing! Cut the bars completely, then place them on a baking sheet to freeze solid (about 2 hours). Once solid, transfer them to a freezer-safe, airtight container, separating layers with parchment paper. They will keep beautifully for up to 3 months.
- How to Reheat: Thaw frozen bars overnight in the refrigerator. Do not attempt to heat them; they taste best served chilled or at room temperature. Simply pull them out and enjoy!
General Information
A Gingerbread Love Story
Gingerbread is one of those foods that feels like it’s been with us forever, and in a way, it has! While we often associate it with Christmas, its origins are ancient. Ginger was a treasured spice brought to Europe via the Silk Road, and the first “gingerbread” recipes date back to the Greeks and Egyptians.
The true magic of gingerbread started in medieval Europe. Bakers learned that adding honey or molasses to ginger-spiced bread created a sturdy, sweet treat that lasted a very long time. This is where the tradition of shaping and decorating came from—the sturdiness of the dough made it perfect for intricate designs. Queen Elizabeth I is famously credited with inventing the first decorated gingerbread men to resemble visiting dignitaries. Imagine that!
Our No-Bake Gingerbread Bars honor that tradition by featuring the essential, warm spice blend (ginger, cinnamon, cloves) but simplify the process for the modern, busy home cook. We preserve the flavor and the spirit of the holiday without needing hours in the kitchen. It’s a delicious nod to history with a modern mom-friendly twist.
Frequently Asked Questions
Can I make the crust ahead of time?
Why are my bars crumbly?
Can I use a different type of frosting?
Do I have to use a food processor for the cookies?
What if I don’t have molasses?
Conclusion
There you have it, friends—the No-Bake Gingerbread Bars that will officially steal the show at your next holiday party. These bars embody everything I love about the holiday kitchen: warm spices, sweet comfort, and a recipe that lets you spend more time with the ones you love, not the oven!
If you loved this simple, spirited dessert, be sure to check out some of my other holiday favorites on Moms Meals Daily. These recipes are just as easy and truly glorious to share:
- You must make my Fudgy Chocolate Peppermint Cookies—they are perfect for a cookie exchange!
- And if you are planning a holiday feast, don’t miss my Easy Holiday Cranberry Sauce.
We have so much more good food to share! Don’t miss a single recipe by subscribing to my newsletter.
I love hearing from you! Tell me: what is your favorite holiday bar recipe? Leave a comment below and share your kitchen stories. And if you make these Sensational No-Bake Gingerbread Bars, snap a photo and tag me on Pinterest!
Follow Moms Meals Daily on Pinterest

Emily brings four years of dedicated baking experience and professional pastry-focused training to Moms Meals Daily. She oversees recipe validation and quality control to ensure every dessert performs consistently and reliably.
No Bake Gingerbread Bars
By Emily Hart
Ingredients
Instructions
Tools Needed
Save this recipe for later ❤️
Follow @mommealsdaily on Pinterest for easy dinners, desserts, and weekly inspiration.
Victoria Recipe | Easy Desserts & Dessert Recipes
Easy & Delicious Recipes
Follow for quick family-friendly recipes, baking inspiration, and comfort food favorites.
Follow on Pinterest