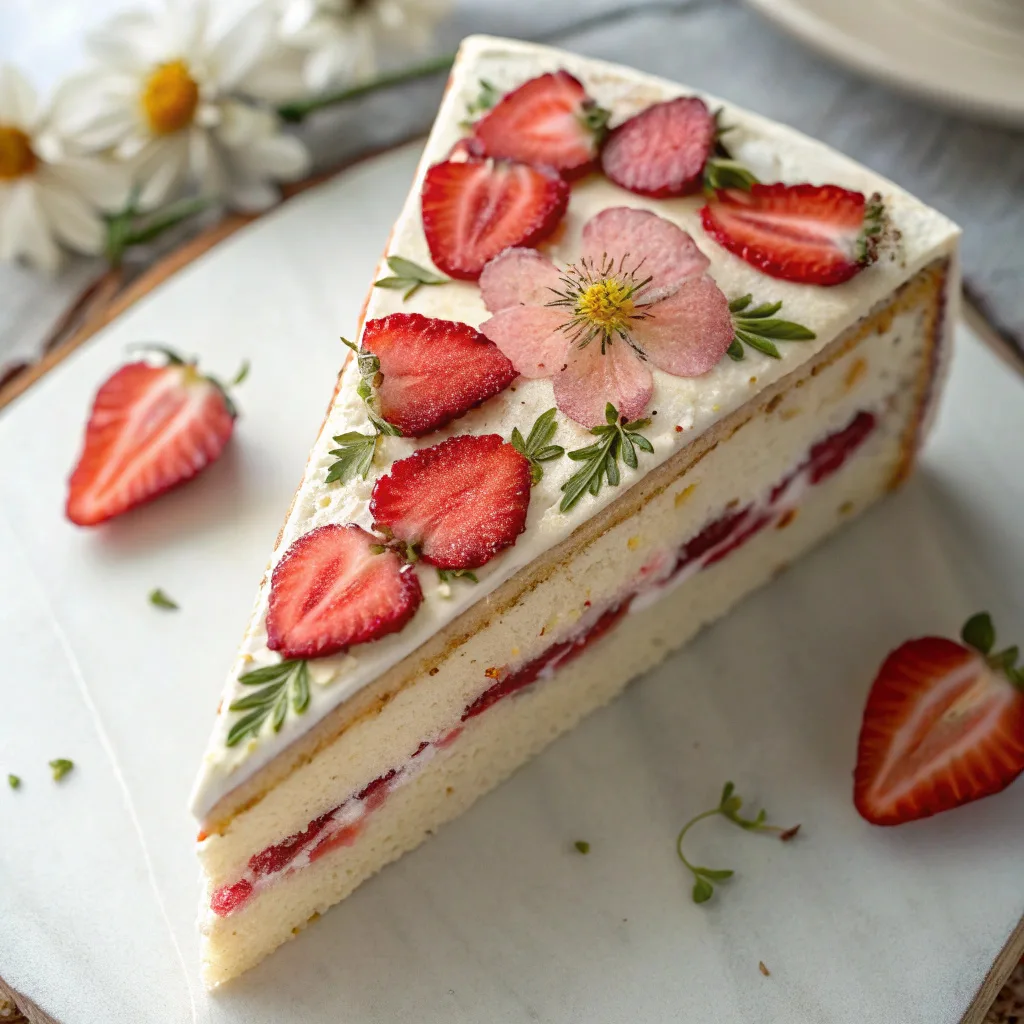
Thanks for being here! I’m so excited to share this Strawberry Pressed-Flower Aesthetic Cake with you today. This cake is not just a feast for the stomach but a beautiful visual treat that celebrates life’s special moments. Whether it’s a birthday party, a cozy summer gathering, or simply a delightful Saturday afternoon at home, this cake brings a touch of elegance and warmth. The combination of fluffy strawberry cake and delicate edible flowers creates a beautiful ambiance that makes any occasion feel special. Plus, this recipe fits perfectly into my love for creating beautiful and delicious desserts that anyone can make. If you love cozy recipes like this, subscribe to my email list!
Table of Contents
Overview of Recipe Content
So, what exactly is the Strawberry Pressed-Flower Aesthetic Cake? This cake features tender layers infused with strawberry flavor, an airy buttercream frosting, and stunning pressed flowers that make it a centerpiece at any gathering. Every forkful is a delightful combination of sweet strawberry goodness, light and fluffy textures, and pretty floral notes. This is a cake that easily pleases a crowd while still making you feel like a master baker! Moreover, strawberries are in season during the warmer months, making this a perfect dessert to showcase fresh, vibrant flavors. It’s not only delicious but a great way to harness the nutritional benefits of strawberries, which are low in calories and high in antioxidants.
Ingredients
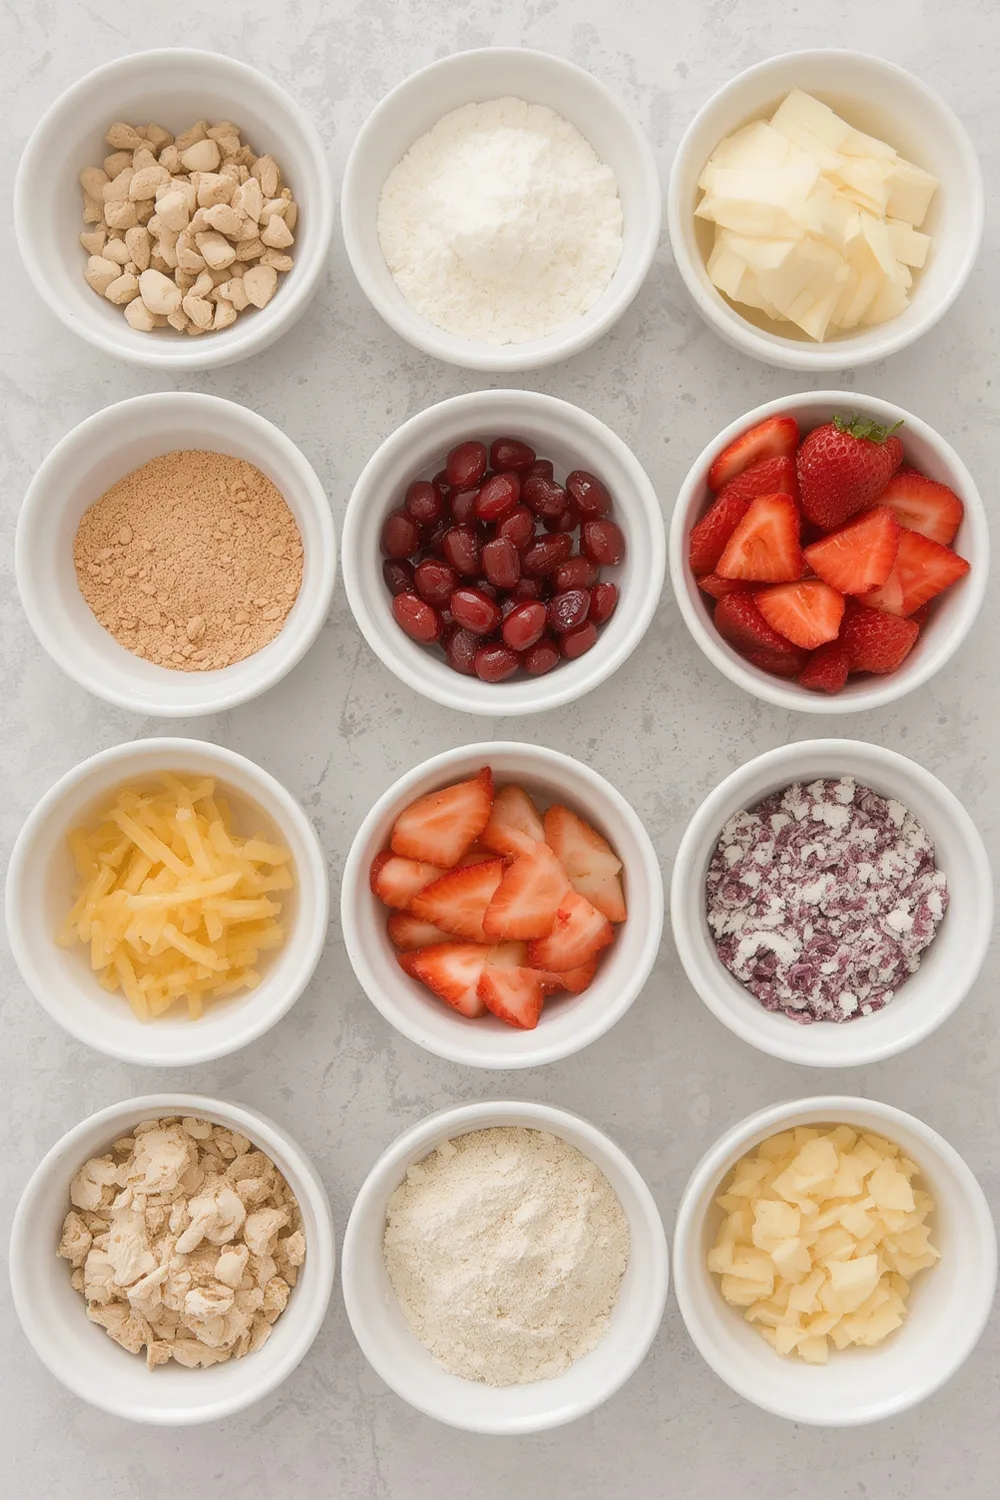
- 2 cups all-purpose flour
- 1 1/2 cups granulated sugar
- 1 tbsp baking powder
- 1/2 tsp salt
- 1 cup unsalted butter, softened
- 4 eggs
- 1/2 cup sour cream
- 1 tsp vanilla extract
- 1 cup fresh strawberries, puréed
- 2 cups powdered sugar
- 1/4 cup milk
- Edible pressed flowers for decoration
Tools Needed
- 3 round 9-inch cake pans
- Mixing bowls
- Electric mixer
- Rubber spatula
- Parchment paper
- Measuring cups and spoons
- Cooling racks
Suggested Substitutions and Additions
- Substitute all-purpose flour with gluten-free flour for a gluten-free version.
- Use coconut cream instead of sour cream for a dairy-free option.
- Add lemon zest to the batter for an extra zing.
- Incorporate whipped cream between the cake layers for added creaminess.
How to Make
Step 1: Preheat Your Oven and Prepare the Pans
Start by preheating your oven to 350°F (175°C). Meanwhile, prepare your cake pans by greasing them well with butter and lining them with parchment paper. This will ensure that your cakes come out beautifully without sticking.
Step 2: Mix the Dry Ingredients
In a large mixing bowl, combine the flour, sugar, baking powder, and salt. Whisk together lightly until well blended. You’ll know it’s ready when the ingredients have a light, fluffy texture.
Step 3: Cream the Butter
In another huge mixing bowl, cream the softened unsalted butter until it’s light and fluffy. This usually takes about 3-5 minutes using an electric mixer. You’ll know it’s perfect when it looks pale and airy!
Step 4: Incorporate Eggs and Wet Ingredients
Add the eggs one at a time to the creamed butter, mixing well after each addition. Follow this by adding the sour cream, vanilla extract, and the fresh strawberry purée. The mixture will turn a lovely shade of soft pink, and your kitchen will smell divine!
Step 5: Combine Dry and Wet Mixtures
Gradually add the dry ingredients into the wet mixture, stirring gently until just combined. Be careful not to overmix—this can lead to a dense cake. You want to retain all that airiness!
Step 6: Bake the Cakes
Evenly distribute the batter into your prepared cake pans. Bake in the preheated oven for about 25-30 minutes or until a toothpick inserted into the center comes out clean. The aroma wafting through your kitchen will be hard to resist!
Step 7: Cool the Cakes
Once baked, transfer the cake layers onto cooling racks. Allow them to cool for about 10 minutes in the pans before removing them to cool completely.
Step 8: Prepare the Frosting
In a clean bowl, beat the softened butter until creamy. Gradually add the powdered sugar, mixing until smooth. Add in milk until you get a light and spreadable consistency.
Step 9: Assemble the Cake
Once the cake layers are completely cool, place one layer on a serving plate. Spread a generous layer of buttercream frosting over it, then add the next layer. Repeat this process until all layers are stacked. Frost the top and sides of the cake with the remaining buttercream.
Step 10: Decorate with Edible Flowers
Now for the fun part! Press the edible flowers gently into the frosting to create a stunning visual appeal. Be sure to use a variety of colors for a vibrant look.
What to Serve with Strawberry Pressed-Flower Aesthetic Cake
This gorgeous cake pairs wonderfully with a dollop of whipped cream or a scoop of vanilla ice cream. For drinks, consider serving it with a refreshing berry lemonade or a chilled glass of sparkling water with mint. If you’re interested in other recipes, you might also enjoy my Strawberry Shortcake Recipe or Chocolate-Covered Strawberries.
Tips for Making It Perfect
- Prep the cake layers the day before if you’re short on time. Just frost and decorate when you’re ready to serve.
- If your cake layers dome up while baking, use a serrated knife to level them out for a more polished look.
- Feel free to double the recipe if you’d like to make a larger cake for a party.
- If you have leftover frosting, it can be stored in the refrigerator for up to a week. Just re-whip it before using.
Storage Instructions
To store leftover cake, wrap individual slices tightly in plastic wrap and place them in an airtight container. They will stay fresh in the refrigerator for up to 5 days. For longer storage, you can freeze slices, ensuring they are well-wrapped. They will be best enjoyed within 2 months. When you’re ready to indulge, simply thaw in the refrigerator overnight.
General Information
The inspiration for this Strawberry Pressed-Flower Aesthetic Cake comes from my many experiences spent in my grandmother’s garden. She often used flowers in her cooking and desserts, creating a beautiful balance between aesthetics and flavor. This cake symbolizes cherished memories while satisfying my sweet tooth and love for baking.
Frequently Asked Questions
- Can I substitute fresh strawberries with frozen ones?
Yes, just ensure they are thawed and drained well before puréeing to avoid excess moisture.
- How long can I store this cake?
In an airtight container, it should last up to 5 days in the fridge or 2 months in the freezer.
- Why is my cake dense?
Overmixing the batter can lead to a dense cake. Mix until just incorporated!
- Can I make this cake gluten-free?
Absolutely! Substitute the all-purpose flour with a gluten-free blend, and it should work beautifully.
- What if I don’t have any edible flowers?
No worries! The cake is stunning even without them, or you can decorate with fresh fruit instead.
Conclusion
This Strawberry Pressed-Flower Aesthetic Cake is more than just a dessert; it’s an experience. It celebrates the beauty of gathering with loved ones and the artistry of baking. I hope you enjoy making this cake just as much as I did. If you’re looking for another lovely recipe to pair with this one, check out my Raspberry Cake Recipe or my Simple Strawberry Shortcake.
Goodbye for now, and happy baking!
Interactive Elements
I would love to hear your thoughts on this recipe! Please leave a review or comment below. Also, if you make this cake, share a photo on Pinterest! You can find me on Instagram, and feel free to tag me in your amazing cake creations.
Nutritional Information
Approximate calories and macros per serving:
| Nutrient | Amount |
| Calories | 350 |
| Total Fat | 18g |
| Saturated Fat | 10g |
| Cholesterol | 60mg |
| Sodium | 200mg |
| Total Carbohydrates | 45g |
| Dietary Fiber | 1g |
| Sugars | 30g |
| Protein | 3g |

Emily brings four years of dedicated baking experience and professional pastry-focused training to Moms Meals Daily. She oversees recipe validation and quality control to ensure every dessert performs consistently and reliably.
Strawberry Pressed-Flower Aesthetic Cake Recipe
By Emily Hart
Ingredients
Instructions
Tools Needed
Save this recipe for later ❤️
Follow @mommealsdaily on Pinterest for easy dinners, desserts, and weekly inspiration.
Victoria Recipe | Easy Desserts & Dessert Recipes
Easy & Delicious Recipes
Follow for quick family-friendly recipes, baking inspiration, and comfort food favorites.
Follow on Pinterest