Thanks for being here! I’m so excited to share this No Bake Peanut Butter Rice Krispie Bars recipe with you. These delicious, chewy bars have been a staple in my kitchen for years, satisfying my sweet tooth while making my family smile. They’re the perfect blend of crunchy rice cereal and creamy peanut butter — truly a match made in heaven. Not to mention, they fit into our busy lives with their quick prep and easy assembly, making them a go-to dessert for any occasion. Plus, with only a few simple ingredients, these bars are a fantastic option for those who want to whip up something delightful without turning on the oven. If you love cozy recipes like this, subscribe to my email list!
Table of Contents
Overview of Recipe Content
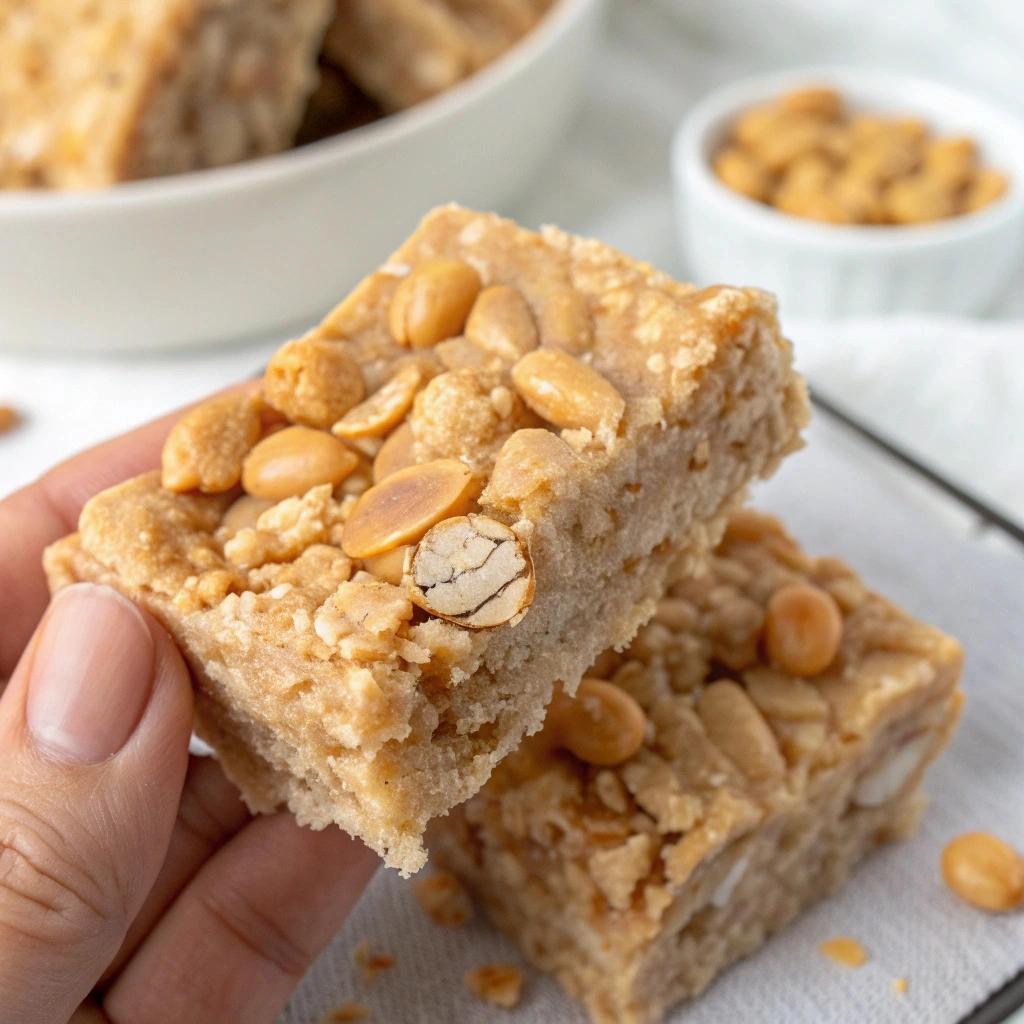
This No Bake Peanut Butter Rice Krispie Bars recipe is a delightful treat that both kids and adults can enjoy! Typically served as a dessert or snack, they’re perfect for bake sales, an afternoon pick-me-up, or even a sweet addition to a lunchbox. Imagine the crispy texture from the Rice Krispies paired harmoniously with rich peanut butter and a hint of sweetness. They are quick to make and are both comforting and crowd-pleasing. Not to mention, they provide a protein boost from the peanut butter, making them a more nutritious snack choice. So whether you’re planning for a party or preparing for the week ahead, these bars are sure to delight!
Ingredients

- 3 cups Rice Krispies cereal
- 1 cup creamy peanut butter
- 1 cup honey or maple syrup
- 1/2 cup powdered sugar
- 1 teaspoon vanilla extract
- Pinch of salt
- Optional: 1/2 cup chocolate chips or chopped nuts
Tools Needed
- Mixing bowl
- Saucepan
- Wooden spoon or spatula
- 9×9 inch baking pan
- Parchment paper (optional)
Suggested Substitutions and Additions
- Almond butter instead of peanut butter for a nut-free option
- Agave syrup in place of honey for a vegan choice
- Add dried fruits or seeds for a chewy texture and extra flavor
- Substitute Rice Krispies with gluten-free cereal for a gluten-free treat
How to Make
Step 1: Prepare the Baking Pan
Start by lining your 9×9 inch baking pan with parchment paper for easy removal later on. If you don’t have parchment paper, you can lightly grease the pan with cooking spray or a little bit of oil. This step is key to avoiding sticky bars!
Step 2: Mix the Peanut Butter and Sweetener
In a saucepan over medium heat, combine the creamy peanut butter and honey (or maple syrup). Stir them together until everything is well combined and warm. You’ll know it’s ready when it starts to smell nutty and golden!
Step 3: Stir in the Sugar and Vanilla
Remove the saucepan from heat and mix in the powdered sugar, vanilla extract, and a pinch of salt. Stir until you achieve a smooth and glossy mixture. This sweet, creamy blend is what gives your bars that irresistible flavor.
Step 4: Incorporate the Rice Krispies
Gradually add in the Rice Krispies cereal, gently folding it in with a wooden spoon or spatula. Be careful not to crush the cereal too much; we want to maintain that delightful crunch in each bite!
Step 5: Transfer to the Baking Pan
Once the cereal is fully coated, pour the mixture into your lined baking pan. Use the spatula to spread it out evenly, pressing it down firmly to ensure the bars keep their shape once cut.
Step 6: Chill and Cut
Pop the pan into the refrigerator for about 1-2 hours until everything is set. Once they’re firm, lift them out using the parchment paper, and cut them into squares or bars. Enjoy the satisfying crunch!
What to Serve with No Bake Peanut Butter Rice Krispie Bars
These bars are delightful on their own, but you might also enjoy them alongside a scoop of vanilla ice cream or fresh fruit. If you’re hosting a gathering, consider serving them with my Chocolate Chip Cookies or those delicious No Bake Chocolate Oatmeal Cookies — the perfect sweet treat spread for any occasion!
Tips for Making It Perfect
- To prep in advance, you can measure out all your ingredients the night before, which will save you time.
- If the mixture feels too crumbly or dry, don’t hesitate to add a bit more peanut butter or honey until it’s the right consistency.
- Make a double batch for larger gatherings! Just double your ingredients, and ensure your mixing bowl is big enough.
- These bars taste even better the next day, so feel free to make them ahead of time.
- For a special touch, drizzle melted chocolate over the top for an added layer of flavor!
Storage Instructions
Store your No Bake Peanut Butter Rice Krispie Bars in an airtight container at room temperature for up to one week to keep them soft, chewy, and full of flavor. Keeping the container tightly sealed helps protect the bars from air and moisture, ensuring the rice cereal stays pleasantly crisp while the peanut butter layer remains smooth and rich.
If you’d like them to last longer, freezing is an excellent option. Wrap each bar individually in plastic wrap or parchment paper to prevent freezer burn, then place the wrapped bars in a freezer-safe bag or container. Stored this way, they can stay fresh in the freezer for up to three months, making them perfect for meal prep or future cravings.
When you’re ready to enjoy one, simply remove it from the freezer and let it thaw at room temperature for about 10 to 15 minutes. This brief thawing time allows the bar to soften just enough to restore its ideal texture, making it ready to enjoy with the same delicious taste as when it was freshly made.
General Information
Peanut butter and cereal bars have their origins in many traditional recipes that combine easy ingredients to create delicious snacks. They often remind me of my childhood, where every school bake sale included some version of these rich treats. The creativity people showcased in their various adaptations inspired my own version, which brings together the simple joys of comfort food and a healthy twist.
Frequently Asked Questions
Can I use a different sweetener?
Yes! You can swap honey for agave syrup or maple syrup depending on your dietary needs.
How long can I store these bars?
They can last up to a week at room temperature or up to 3 months in the freezer if stored properly.
Why are my bars too crumbly?
They may need more binding agents like peanut butter or honey. Ensure you mix thoroughly next time!
Can I make them vegan?
Sure! Just replace honey with maple syrup, and use a plant-based butter or margarine if you like.
What’s the best way to cut these bars?
Using a sharp knife, cut the bars into squares while they are still in the pan. This makes it much easier!
Conclusion
What makes this No Bake Peanut Butter Rice Krispie Bars recipe special is its simplicity combined with the happiness it brings to the table. They’re a delightful treat for any occasion, easily customizable, and sure to bring a smile to everyone’s face! For more easy recipes, be sure to check out my Chocolate Peanut Butter Energy Balls or my No Bake Oatmeal Cookies.
Thanks for joining me today! I can’t wait for you to try this recipe. Let me know how yours turn out and don’t forget to share your photos on Pinterest or tag me on Instagram — I love seeing your creations!
Interactive Elements
Feel free to leave a review or a comment. I love hearing from you! You can also share a photo on Pinterest or tag me on Instagram to showcase your wonderful creations.
Nutritional Information
Approximate calories and macros per serving:
- Calories: 150
- Protein: 4g
- Fat: 8g
- Carbohydrates: 15g
- Fiber: 1g
- Sugars: 5g

Emily brings four years of dedicated baking experience and professional pastry-focused training to Moms Meals Daily. She oversees recipe validation and quality control to ensure every dessert performs consistently and reliably.
No Bake Peanut Butter Rice Krispie Bars
By Emily Hart
Ingredients
Instructions
Tools Needed
Save this recipe for later ❤️
Follow @mommealsdaily on Pinterest for easy dinners, desserts, and weekly inspiration.
Victoria Recipe | Easy Desserts & Dessert Recipes
Easy & Delicious Recipes
Follow for quick family-friendly recipes, baking inspiration, and comfort food favorites.
Follow on Pinterest