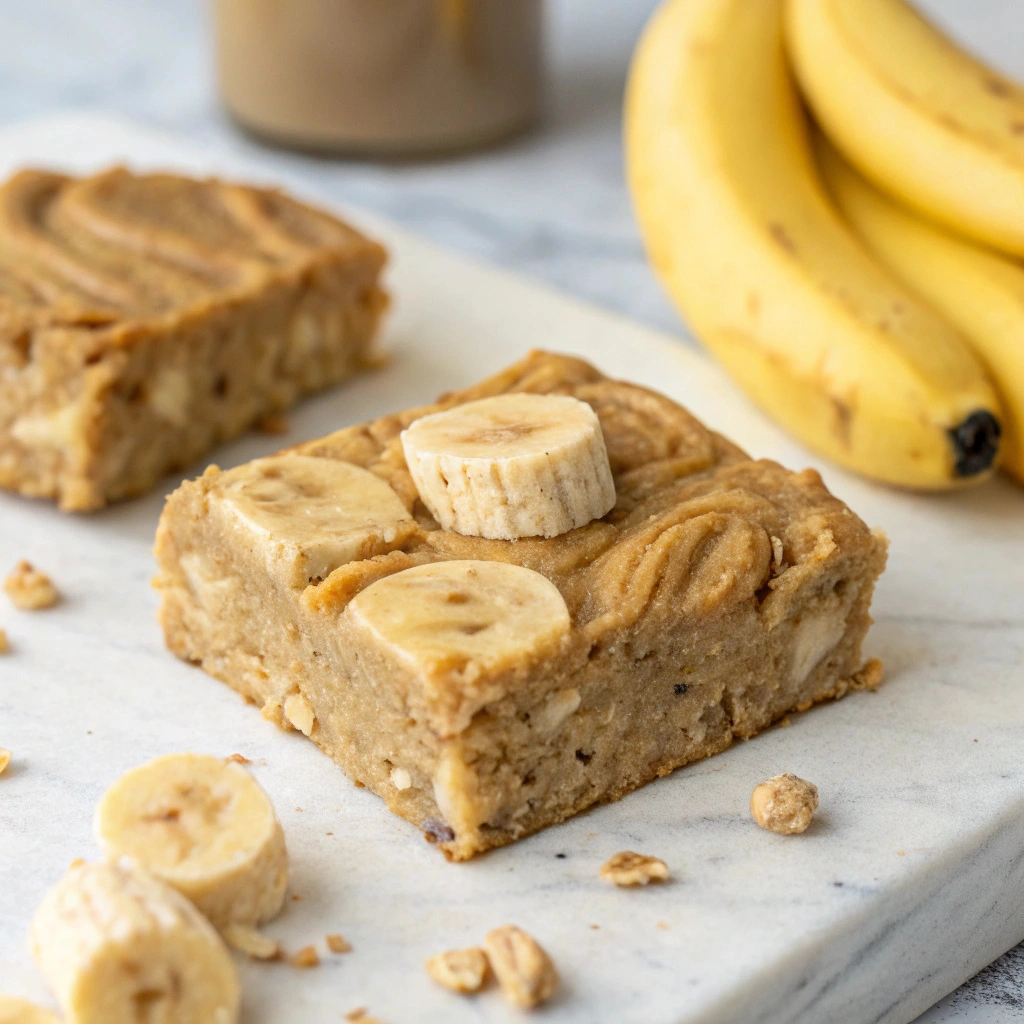
Thanks for being here! I’m so excited to share this Peanut Butter Banana No Bake Bars recipe with you! When life gets busy and you need a quick, guilt-free snack or dessert, these bars fit the bill perfectly. They are not only delicious but also packed with wholesome ingredients, bringing together the sweet taste of ripe bananas and the rich creaminess of peanut butter. For me, this recipe is special because it reflects the simple joys in life—just like family gatherings filled with laughter or cozy evenings with a good book. And guess what? They’re a fantastic way to indulge healthily!
Table of Contents
Overview of Recipe Content
These Peanut Butter Banana No Bake Bars are a delightful treat perfect for any time of day. Whether you need an after-school snack, a quick breakfast on the go, or a crowd-pleasing dessert for potlucks, these bars have you covered. Imagine each bite bursting with flavor—the sweetness of bananas balanced with the nutty richness of peanut butter, giving you that comforting treat without the need for an oven.
Readers will love these bars because they’re super quick and easy to make with just a few wholesome ingredients. They’re also gluten-free and packed with nutrients, making them an excellent choice for both kids and adults. Packed with potassium from bananas, healthy fats from peanut butter, and a hit of fiber, these bars leave you feeling satisfied and energized.
Ingredients
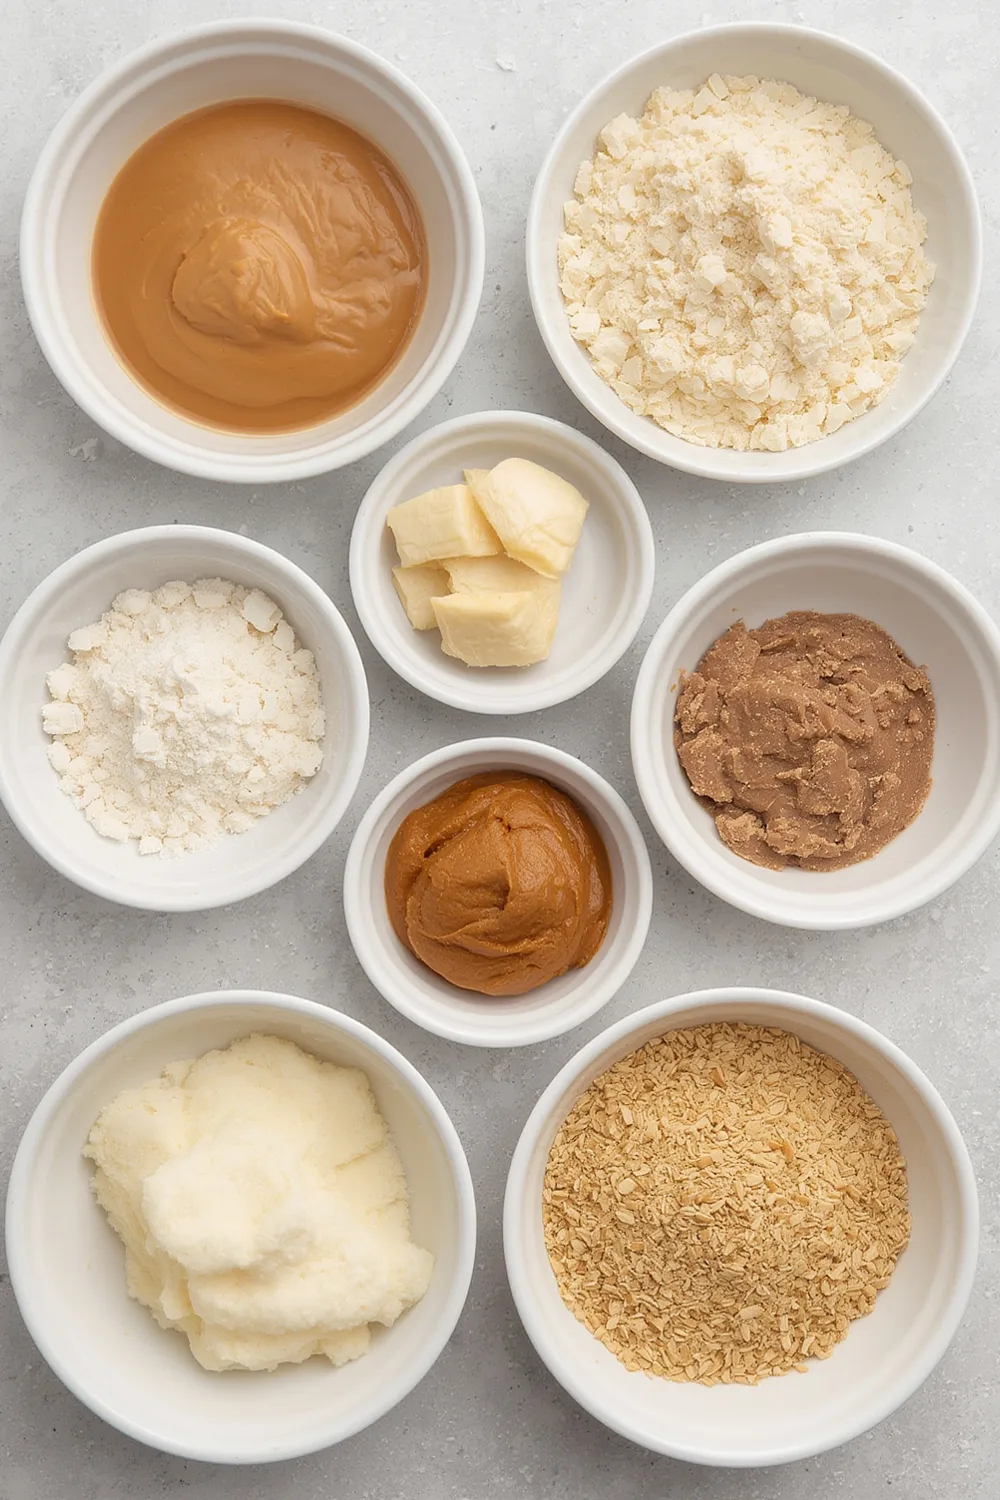
- 2 ripe bananas
- 1 cup creamy peanut butter
- 1 cup rolled oats
- 1/4 cup honey or maple syrup
- 1/2 teaspoon vanilla extract
- A pinch of salt
- Optional: mini chocolate chips or chopped nuts for topping
Tools Needed
- Mixing bowls
- Fork or potato masher
- Rubber spatula or wooden spoon
- 8×8 inch square baking dish
- Parchment paper for easier removal
Suggested Substitutions and Additions
- Swap peanut butter with almond butter or sunflower seed butter for allergies.
- Use agave syrup instead of honey for a vegan version.
- Add protein powder for an extra boost.
- Toss in some dried fruits like cranberries or raisins for more texture.
- Substitute oats with crushed graham crackers for a different flavor profile.
How to Make
Step 1: Mash the Bananas
Start by placing your ripe bananas in a mixing bowl. Using a fork or potato masher, mash them until they are smooth and creamy with just a few small lumps remaining. You’ll know it’s ready when it smells sweet and fragrant, bringing back memories of lazy summer days.
Step 2: Combine Ingredients
In the same bowl, add in the creamy peanut butter, honey (or maple syrup), vanilla extract, and a pinch of salt. Stir it all together until it becomes a delightful, gooey mixture that’s hard to resist!
Step 3: Add the Oats
Now, let’s mix in those rolled oats! Carefully fold the oats into the peanut butter and banana mixture until they are evenly coated. You want to ensure they’re all mixed in without overworking the oat texture. You’ll love the nutty aroma filling your kitchen!
Step 4: Prepare the Baking Dish
Line your baking dish with parchment paper, leaving some overhanging on the sides. This will make it super easy to lift out your bars later. Gently pour your mixture into the prepared dish, spreading it evenly into the corners. Press it down firmly with the back of a spatula to create a compact layer.
Step 5: Chill and Set
Now it’s time to refrigerate! Pop the dish into the fridge for at least 2 hours, or until the mixture firms up. You’ll know it’s ready when you can easily cut it into bars without crumbling.
What to Serve with Peanut Butter Banana No Bake Bars
These bars are perfect on their own, but they can also be paired with:
- Fresh fruit slices like apples or strawberries
- A dollop of yogurt or nut butter on the side
- A warm cup of chai or herbal tea to complement the sweetness
If you’re in the mood for more delectable treats, why not check out my Chocolate Avocado Pudding or the Creamy Coconut Chia Pudding on the blog? Both are amazing and packed with flavor!
Tips for Making It Perfect
- Prep in Advance: You can mash the bananas and combine the wet ingredients a day ahead to save time.
- Fixing Texture Issues: If your bars are too crumbly, add a bit more peanut butter or honey to help bind them.
- Make Ahead: These bars keep well in the fridge for up to a week, or you can freeze them for up to 3 months.
- Double the Batch: If you’re expecting guests, or if you just want to stock up, feel free to double the recipe! Just use a larger baking dish and adjust the chilling time accordingly.
Storage Instructions
These Peanut Butter Banana No Bake Bars should be stored in an airtight container in the refrigerator to help preserve their freshness, flavor, and texture. Keeping them chilled helps the bars stay firm and prevents the banana from softening too much over time. When properly sealed and refrigerated, they’ll stay fresh and delicious for about one week, making them a convenient snack or dessert to enjoy throughout the week.
If you’d like to save some for later, freezing is a great option. Simply cut the bars into individual portions, wrap each one tightly in plastic wrap to protect against freezer burn, and place them in a freezer-safe bag or container. Stored this way, the bars can be frozen for up to three months without sacrificing quality.
When you’re ready to enjoy them, transfer the bars from the freezer to the refrigerator and let them thaw overnight. Thawing slowly in the fridge helps maintain their texture and flavor, ensuring they taste just as satisfying as when they were freshly made.
General Information
Peanut butter and bananas are a match made in heaven, and this recipe beautifully captures that essence. Originating from the classic peanut butter and banana sandwiches that many of us enjoyed growing up, these no-bake bars are a modern twist on a beloved combination. They bring together comforting childhood memories and healthy ingredients to satisfy your cravings without guilt. Anytime I make them, they instantly transport me back to my own childhood kitchen, where my love for food truly blossomed.
Frequently Asked Questions
Can I use ripe bananas that are a bit overripe?
Absolutely! Overripe bananas are sweeter and more flavorful, making them perfect for this recipe.
What if I don’t like oatmeal?
No problem! You can replace the rolled oats with crushed graham crackers or even rice cereal for a different texture.
How long do these bars last in the fridge?
They’ll stay good in an airtight container in the fridge for about a week.
Can I make them gluten-free?
Yes! Just ensure you use gluten-free oats and double-check other ingredients to avoid cross-contamination.
How do I give these a different flavor?
Feel free to add spices like cinnamon or nutmeg, or even switch out the peanut butter for almond or cashew butter for a unique twist.
Conclusion
Recapping the warmth and comfort these Peanut Butter Banana No Bake Bars bring, they are perfect for any occasion—whether you’re hosting friends or just looking for a satisfying snack at home. Their simplicity makes them a delightful addition to your dessert repertoire. If you enjoyed this recipe, I recommend trying my No-Bake Chocolate Energy Bites or my Delicious Almond Joy Bites for more tasty treats.
As always, thanks for joining me on this culinary adventure. Until next time, keep cooking with love and positivity!
Interactive Elements
I’d love to hear from you! Leave a review or comment below to let me know how your Peanut Butter Banana No Bake Bars turned out. If you’re on Pinterest, share a photo of your bars and tag me . You can also tag me on Instagram with your beautiful creations!

Emily brings four years of dedicated baking experience and professional pastry-focused training to Moms Meals Daily. She oversees recipe validation and quality control to ensure every dessert performs consistently and reliably.
Peanut Butter Banana No Bake Bars
By Emily Hart
Ingredients
Instructions
Tools Needed
Save this recipe for later ❤️
Follow @mommealsdaily on Pinterest for easy dinners, desserts, and weekly inspiration.
Victoria Recipe | Easy Desserts & Dessert Recipes
Easy & Delicious Recipes
Follow for quick family-friendly recipes, baking inspiration, and comfort food favorites.
Follow on Pinterest