There’s something magical about a dessert that captures both the simplicity of childhood and the sophistication of adult tastes. Today, I’m thrilled to share with you my No Bake Graham Cracker Icebox Cake. This delightful treat is not only incredibly easy to make but it also brings together the comforting flavors of creamy vanilla pudding, rich whipped cream, and the satisfying crunch of graham crackers—all without turning on your oven!
This recipe has a fond place in my heart, as it reminds me of summer potlucks with family and friends, where laughter filled the air and sweet treats adorned the picnic tables. With each bite, you’re tucked into a cozy embrace of flavors and textures: the creamy, cool filling pairs perfectly with the crunchy graham crackers, creating a symphony of taste in every layer. I promise this cake will become your new go-to for quick gatherings and bake sales alike.
So, if you’re ready to indulge in something simple, satisfying, and utterly delightful, keep reading. I’m here to guide you through every step of crafting this no bake treasure. If you love cozy recipes like this, subscribe to my email list!
Table of Contents
Overview of Recipe Content
This No Bake Graham Cracker Icebox Cake is truly a gift for anyone looking for easy desserts with few ingredients. It’s perfect for summertime barbecues, family parties, and kids’ birthday celebrations. This cake is best served chilled, so you can whip it up ahead of time, let it sit in the refrigerator, and be the star of the dessert table.
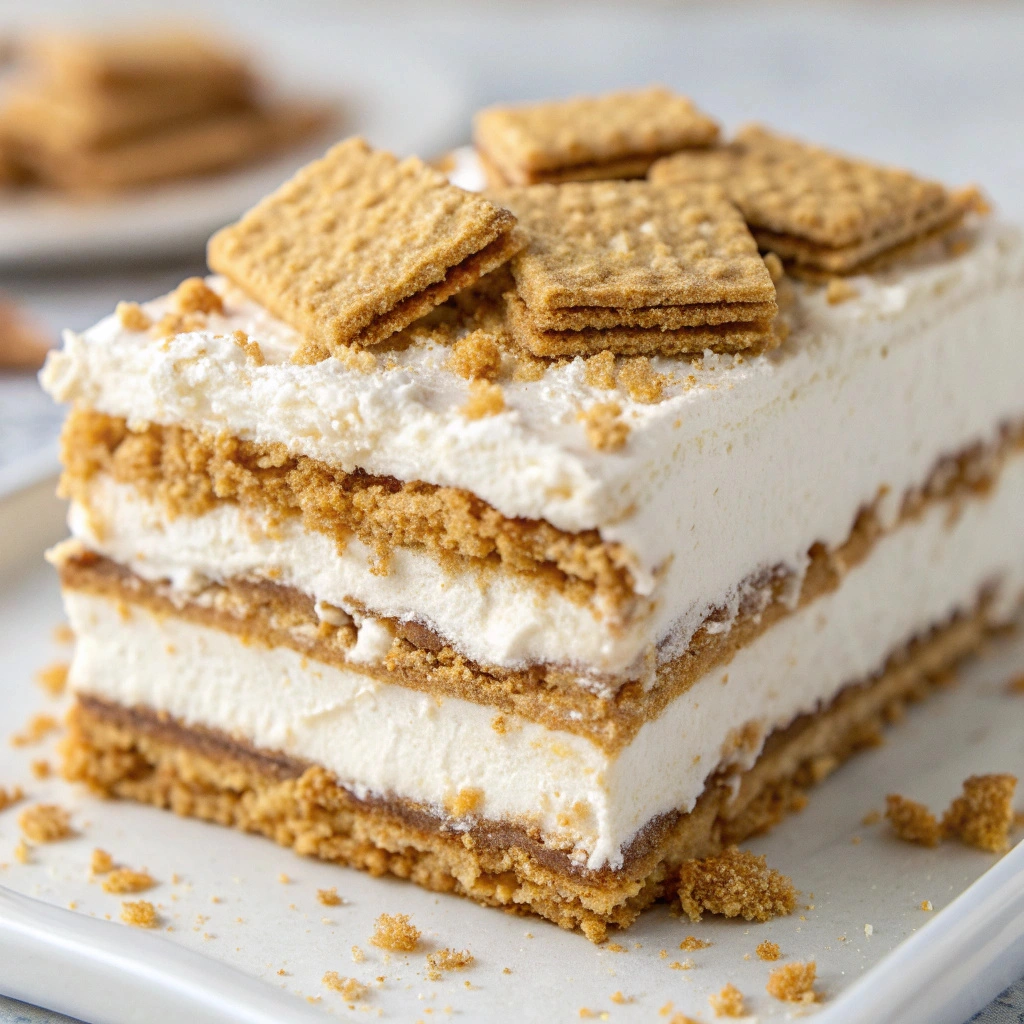
With its luscious combination of creamy layers and subtle sweetness, the cake offers a refreshingly sweet finish to any meal. Imagine biting into a layer of fluffy cream enveloping that delightful crunch—every slice is a harmony of flavors and textures that will have your guests coming back for second helpings.
Readers will love this icebox cake not just for its ease and no-bake convenience, but also because it’s a crowd-pleaser that is endlessly customizable. Perfect for warm weather or as a delightful treat any time of the year, its versatility makes it fit for any occasion!
Ingredients

- 2 cups heavy whipping cream
- 1 cup powdered sugar
- 2 teaspoons vanilla extract
- 1 package (14.4 oz) graham crackers
- 2 cups vanilla pudding (instant or homemade)
- Optional: chocolate shavings for garnish
- Optional: fresh berries for topping
Tools Needed
- Mixing bowl
- Electric mixer or whisk
- 9×13 inch baking dish
- Spatula
- Measuring cups and spoons
- Plastic wrap
Suggested Substitutions and Additions
There are countless ways to customize your Graham Cracker Icebox Cake! Consider these substitutions:
- For a gluten-free version, swap out regular graham crackers for gluten-free graham crackers or crushed gluten-free cookies.
- If you’re looking for a dairy-free option, try using coconut cream instead of heavy whipping cream and almond milk pudding for the filling.
- Add richness by folding in some sweetened cocoa powder to the whipped cream for a chocolate twist.
- Mix in your favorite fruits like sliced strawberries or mashed bananas between layers for added flavor and freshness.
How to Make
Step 1: Prepare the Cream Filling
In a large mixing bowl, combine the heavy whipping cream, powdered sugar, and vanilla extract.
Using an electric mixer, whip on medium to high speed until soft peaks form—this usually takes about 3-5 minutes.
You want the cream to be fluffy and perfectly airy, so take your time to watch the transformation! The sweet scent of vanilla will fill your kitchen, creating a delightful atmosphere.
Step 2: Layer the Ingredients
In your 9×13 inch baking dish, start by laying down a single layer of graham crackers, just enough to cover the bottom.
Then, spread half of the prepared cream filling on top of the crackers, smoothing it out to ensure every bite will be filled with that rich lusciousness.
Step 3: Create Additional Layers
Repeat the process by adding another layer of graham crackers followed by a layer of vanilla pudding.
Add the remaining cream filling on top of the pudding, smoothing again for an even layer.
Finish by adding a final layer of graham crackers on top, covering the entire cake.
Step 4: Let It Chill
Cover the cake tightly with plastic wrap and place it in the refrigerator.
For best results, let it chill for at least 4 hours, but overnight is even better! This allows the flavors to meld beautifully and the graham crackers to soften, creating that classic icebox texture.
Step 5: Serve and Enjoy
Before serving, feel free to top your cake with chocolate shavings or fresh berries for an additional burst of flavor.
Slice into squares and watch guests delight as they discover the creamy layers waiting inside!
What to Serve with No Bake Graham Cracker Icebox Cake
This cake pairs wonderfully with various side dishes and drinks:
- Serve alongside fresh fruit salad for a lighter option on the side.
- Offer a scoop of vanilla or chocolate ice cream if you’re looking to take the indulgence up a notch.
- Suggested drink pairings include iced tea, lemonade, or a chilled white wine for adults.
Related recipes to try:
Tips for Making It Perfect
- Prep-ahead advice: You can make this dessert a day or two in advance. Flavors only get better over time!
- Fixing common mistakes: If your whipped cream isn’t thickening, ensure your bowl and beaters are cold. You can even refrigerate them for 15 minutes before whipping.
- Texture and flavor adjustments: For added texture and crunch, try folding some chopped nuts or toffee bits into the cream filling.
- Doubling or meal prep tips: This recipe easily doubles; just use a larger baking dish and two boxes of graham crackers.
Storage Instructions
To keep your No Bake Graham Cracker Icebox Cake fresh, follow these storage tips:
- Store leftovers in the fridge, covered tightly with plastic wrap, for up to 3-4 days.
- Reheating isn’t necessary; this dessert is best enjoyed cold and fresh from the refrigerator.
- You can make it a few days in advance and store it until serving!
- For freezing, I recommend freezing individual slices. Wrap each slice in plastic wrap and store them in an airtight container for up to 2 months. When you’re ready to indulge, simply thaw in the fridge.
General Information
Icebox cakes have a rich history, dating back to the early 20th century when refrigeration became available in homes. The concept of layering simple ingredients without baking has made this dessert a favored nostalgic option across generations.
I distinctly remember my grandmother’s version, which she made as a special treat after summer family gatherings. Each slice was filled with love, laughter, and sweet memories—and that’s the same spirit I hope this recipe brings to your table!
Frequently Asked Questions
- Can I use regular pudding instead of instant pudding?
You can use regular pudding, but it will require cooking and additional time. Instant pudding is perfect for the quick and easy nature of this recipe!
- How long can I store leftovers?
Leftovers can be stored in the refrigerator for 3-4 days, but they won’t last long—this treat is just too delicious!
- What if I don’t have heavy whipping cream?
You could use store-bought whipped topping if you’re in a hurry or don’t have heavy cream on hand, though the texture may vary slightly.
- Can I make this dessert without eggs?
Yes! This recipe is egg-free, making it a safe option for those with egg allergies or dietary restrictions.
Conclusion
This No Bake Graham Cracker Icebox Cake is a delightful blend of simplicity and flavor that is bound to impress at any gathering. Whether you’re looking for easy desserts for a crowd or a comforting treat for yourself, this recipe will surely bring smiles all around. The ease, flavor, and versatility that this dessert provides make it truly special.
If you enjoyed this icebox cake recipe, I know you’ll also love my No Bake Chocolate Eclair Cake!
I hope you give this recipe a try and see how it brings joy and sweetness to your table. Happy baking!
Interactive Elements
I’d love to hear your thoughts! Please leave a comment or review below, and don’t forget to share a photo of your finished cake on Pinterest.
You can also tag me on Instagram—I can’t wait to see how your version turns out!
Nutritional Information
Here is the approximate nutritional value per serving:
Calories: 290
Protein: 3g
Carbohydrates: 35g
Fat: 16g
Fiber: 1g
Sodium: 120mg

Emily brings four years of dedicated baking experience and professional pastry-focused training to Moms Meals Daily. She oversees recipe validation and quality control to ensure every dessert performs consistently and reliably.
No Bake Graham Cracker Icebox Cake
By Emily Hart
Ingredients
Instructions
Tools Needed
Save this recipe for later ❤️
Follow @mommealsdaily on Pinterest for easy dinners, desserts, and weekly inspiration.
Victoria Recipe | Easy Desserts & Dessert Recipes
Easy & Delicious Recipes
Follow for quick family-friendly recipes, baking inspiration, and comfort food favorites.
Follow on Pinterest