There’s something magical about the fusion of coffee and chocolate. As a chef passionate about storytelling through food, the No Bake Mocha Chocolate Dessert Bars hold a special place in my heart. This simple recipe transports me back to cozy afternoons spent in my grandmother’s kitchen, where she would brew rich coffee and prepare sweet treats that filled the air with warmth. Each bite of these decadent bars is reminiscent of those cherished moments—a blend of creamy chocolate, rich coffee, and a touch of sweetness that cradles your taste buds.
Table of Contents
The combination of flavors in these bars is nothing short of divine. The robust espresso melds beautifully with smooth chocolate, creating a delightful depth that makes each bite a satisfying experience. The texture is a creamy dream, with a crumbly base that balances the luscious filling perfectly. If you’re looking for an easy dessert that can be whipped up in no time, these No Bake Mocha Chocolate Dessert Bars are for you. They are perfect for bake sales, family gatherings, or even just a cozy night in. Trust me; you’ll want to savor every indulgent moment. If you love cozy recipes like this, subscribe to my email list!
Overview of Recipe Content
This recipe is a delightful blend of flavors and textures, combining coffee, chocolate, and a bit of sweetness into handheld bars that require no baking. These bars are best served chilled, making them a fabulous treat for warm days or an effortless dessert solution for dinner parties.
When you take a bite, you’re greeted with the rich, velvety taste of chocolate and the perfect kick of coffee. The subtle sweetness perfectly balances the bitterness of the mocha flavor—creating an indulgent yet comforting experience that is sure to please both coffee lovers and dessert enthusiasts alike.
Readers will love this recipe not just for its taste but also for its simplicity. With just a few ingredients and minimal prep time, you can create a snazzy dessert that feels luxurious. Plus, it’s customizable, making it a versatile choice for different occasions or dietary preferences—all without turning on the oven!
Ingredients

- Base:
- 1 ½ cups graham cracker crumbs
- ½ cup unsweetened cocoa powder
- 1/3 cup powdered sugar
- ½ cup unsalted butter, melted
- Mocha filling:
- 1 cup cream cheese, softened
- 1 cup powdered sugar
- 2 tablespoons brewed espresso or strong coffee
- 1 teaspoon vanilla extract
- 1 cup whipped cream or Cool Whip
- Topping:
- 1 cup semisweet chocolate chips
- 2 tablespoons shortening (for a glossy finish)
- Optional: cocoa powder or chocolate shavings for garnish
Tools Needed
- Mixing bowls
- Whisk or electric mixer
- 9×9 inch baking dish or square pan
- Parchment paper
- Rubber spatula
- Microwave-safe bowl (for melting chocolate)
Suggested Substitutions and Additions
Don’t fret if you’re missing an ingredient or two! Here are some helpful suggestions:
- Dietary swaps:
- Use gluten-free graham crackers for a gluten-free option.
- Swap cream cheese for a vegan cream cheese alternative to make it dairy-free.
- Ingredient alternatives:
- Try using almond flour or crushed nuts as a base instead of graham cracker crumbs for a different flavor and texture.
- If you don’t have espresso, instant coffee mixed with hot water can work as a substitute.
- Flavor additions:
- Add a sprinkle of cinnamon or a teaspoon of espresso powder to the filling for an extra coffee kick.
- Drizzle caramel sauce over the melted chocolate for a rich, sweet contrast.
How to Make
Step 1: Prepare the Base
In a mixing bowl, combine the graham cracker crumbs, unsweetened cocoa powder, and powdered sugar. The chocolate aroma fills the air, instantly delighting your senses. Pour in the melted butter and mix until everything is well combined, forming a crumbly mixture that holds together when pressed.
Press this mixture firmly into the bottom of a greased or parchment-lined 9×9 inch baking pan, ensuring an even layer. The texture should feel a little like damp sand, forming a solid base that will hold the creamy filling.
Step 2: Create the Mocha Filling
In a separate mixing bowl, beat together the softened cream cheese and powdered sugar using an electric mixer until smooth and fluffy. The mixture should feel light, almost like whipped clouds. Slowly add in the brewed espresso and vanilla extract, mixing until fully incorporated.
Gently fold in the whipped cream until the filling is light and airy. The transition of colors—rich cream cheese blending with the dark coffee—is a stunning sight. It’s vital to combine carefully, keeping that fluffy texture intact. Once everything is mixed, spread this luscious mocha filling over the prepared crust, using a rubber spatula to create an even layer.
Step 3: Prepare the Topping
In a microwave-safe bowl, combine the semisweet chocolate chips and shortening. Microwave in short intervals, stirring between each, until melted and smooth. This glossy chocolate topping is absolute perfection! The aroma is decadent as the heat makes the chocolate even more irresistible. Carefully pour the melted chocolate over the mocha filling, spreading it evenly to create a beautiful finish.
Step 4: Chill and Serve
Place the dessert bars in the refrigerator for at least 4 hours, or until fully set. The waiting may feel like the hardest part, but trust me, it’ll be worth it!
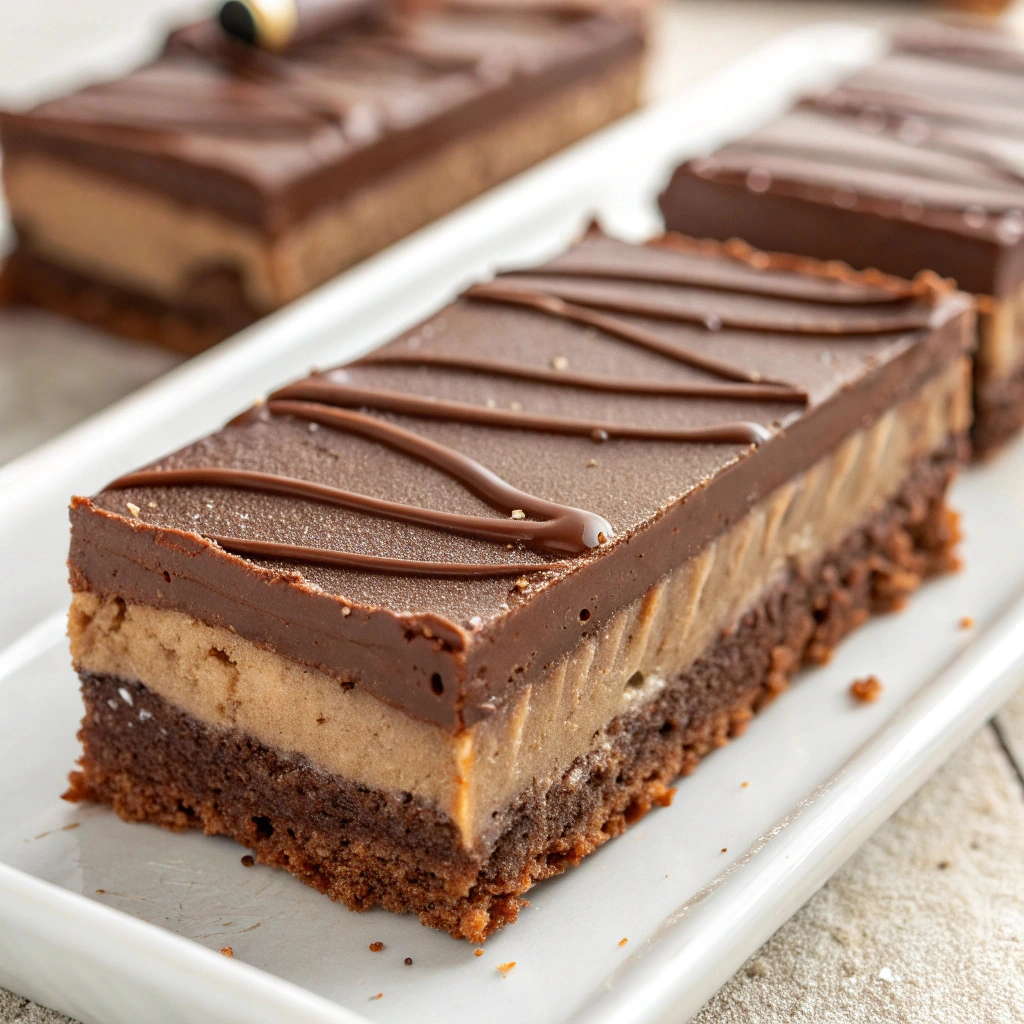
Once chilled, lift the bars from the pan using the edges of the parchment paper. Cut into squares or rectangles with a warm knife for clean edges. The moment you slice into these bars, the layers will reveal their beauty—a marbled mocha and chocolate masterpiece.
What to Serve with No Bake Mocha Chocolate Dessert Bars
While these bars are delicious on their own, they can be paired with:
- Side dishes:
- Fresh berries such as strawberries or raspberries for a tart contrast.
- A scoop of vanilla ice cream on the side for extra indulgence.
- Drinks:
- A cup of rich coffee to complement the mocha flavor.
- A glass of milk for a classic dessert pairing.
- Garnishes:
- A dusting of cocoa powder or chocolate shavings will add an elegant touch to your bars.
For more delightful treats, consider making my No Bake Strawberry Cheesecake or Chocolate Coconut Energy Bites for a delightful dessert spread.
Tips for Making It Perfect
**Prep-ahead advice:** You can prepare the base a day in advance and store it in the refrigerator. Just add the filling and topping when you’re ready to serve.
**Fixing common mistakes:** If your filling is too runny, try adding a bit more powdered sugar to thicken it.
**Texture and flavor adjustments:** For richer flavors, consider using dark chocolate instead of semisweet chocolate for the topping.
**Doubling or meal prep tips:** This recipe can easily be doubled for gatherings! Just use a larger pan and adjust chilling time as needed.
Storage Instructions
To keep your No Bake Mocha Chocolate Dessert Bars fresh:
- **Refrigerator storage:** Store in an airtight container in the refrigerator for up to a week.
- **Reheating methods:** These bars are best served chilled, but you can let them sit at room temperature for 10 minutes before serving if you prefer a softer texture.
- **Make-ahead options:** You can make these bars up to two days in advance without losing flavor.
- **Freezing recommendations:** If you want to store them for longer, freeze the bars in an airtight container for up to 3 months. Allow them to thaw in the refrigerator overnight before serving.
General Information
The history of no bake desserts can be traced back to busy homemakers looking for quick, easy options that still delivered delicious flavors. These bars are a nod to that tradition—a simple yet elegant dessert that requires minimal effort.
I often think about the time I developed this recipe during one of those long, rainy afternoons. I needed something sweet and comforting but found myself lacking the motivation to turn on the oven. Thus, the No Bake Mocha Chocolate Dessert Bars were born, and they have since become a family favorite!
Frequently Asked Questions
**Can I use instant coffee instead of brewed coffee?**
Yes! Mix 2 tablespoons of instant coffee granules with 2 tablespoons of hot water for a similar effect.
**How long can these bars be stored in the fridge?**
They will stay fresh in the refrigerator for about a week when stored in an airtight container.
**What can I do if the filling is too stiff?**
If it’s too stiff, consider mixing in a little more whipped cream or cream cheese until reaching your desired consistency.
**Are there any dietary adaptations I can make?**
You can make these bars gluten-free with gluten-free graham cracker crumbs and dairy-free with appropriate substitutes like vegan cream cheese and whipped topping.
Conclusion
These No Bake Mocha Chocolate Dessert Bars are special not only for their incredible flavors but also for their simplicity and versatility. Each bar is a creamy dream, bursting with coffee and chocolate goodness, and will certainly impress anyone fortunate enough to enjoy them. If you love easy, delicious desserts that can be made for a crowd or with just a few ingredients, this recipe is for you!
For more indulgent treats, be sure to check out my No Bake Peanut Butter Cups or Easy Chocolate Mousse.
Thank you for joining me on this delightful culinary journey. Happy baking—and by baking, I mean, no baking!
Interactive Elements
I would love to hear your thoughts about this recipe! Please leave a comment or review below, and if you try these delectable bars, share a picture on Pinterest
If you’re active on Instagram, tag me in your posts—let’s connect through our love for food!
Nutritional Information
Approximate nutritional values per serving:
Calories: 240
Protein: 4g
Carbohydrates: 26g
Fat: 14g
Fiber: 1g
Sodium: 100mg
Enjoy creating these mouthwatering No Bake Mocha Chocolate Dessert Bars and sharing them with those you love!

Emily brings four years of dedicated baking experience and professional pastry-focused training to Moms Meals Daily. She oversees recipe validation and quality control to ensure every dessert performs consistently and reliably.
No Bake Mocha Chocolate Dessert Bars
By Emily Hart
Ingredients
Instructions
Tools Needed
Save this recipe for later ❤️
Follow @mommealsdaily on Pinterest for easy dinners, desserts, and weekly inspiration.
Victoria Recipe | Easy Desserts & Dessert Recipes
Easy & Delicious Recipes
Follow for quick family-friendly recipes, baking inspiration, and comfort food favorites.
Follow on Pinterest