There’s something magical about celebrating a birthday with a beautifully crafted cake that tastes as delightful as it looks. Today, I’m thrilled to share my Vintage Style Birthday Cake Recipe with Classic Buttercream Piping—a true labor of love and a masterpiece that embodies nostalgia. Inspired by the sweet traditions of my childhood, this cake reminds me of the joyful gatherings spent with family where laughter filled the air and the aroma of freshly baked goods wafted through the kitchen.
Table of Contents
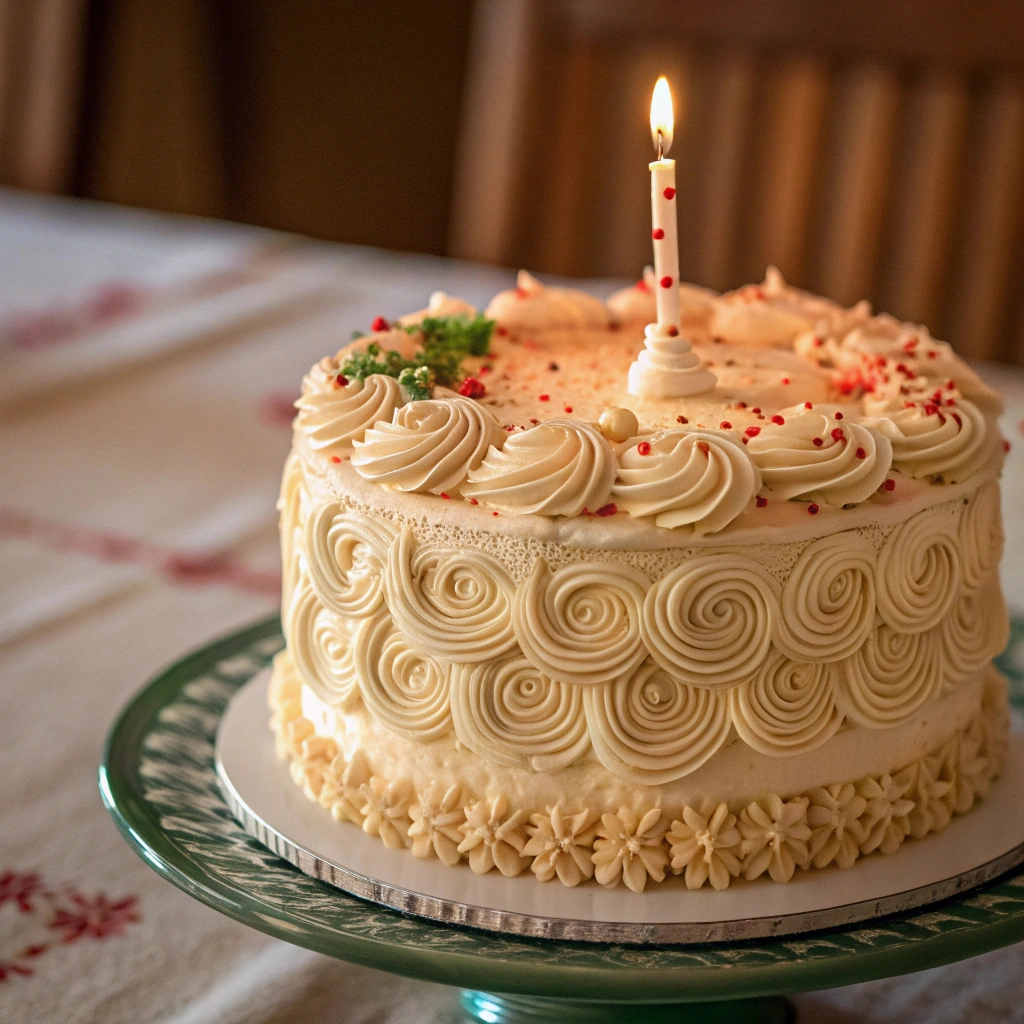
As I gently slice into the cake, the fluffy layers reveal a rich, buttery flavor that dances on the palate, complemented by the velvety smoothness of the classic buttercream. This isn’t just a cake; it’s an experience. The soft crumb and the delicate sweetness make it the perfect way to celebrate life’s special moments. If you love cozy recipes like this, subscribe to my email list!
Overview of Recipe Content
This Vintage Style Birthday Cake is a delightful twist on classic birthday cake ideas that brings a nostalgic feel to any celebration. Whether it’s for an adult or a child’s birthday, this cake fits beautifully into any festive occasion.
Best Served: This cake shines at birthday parties and special gatherings, creating a centerpiece that both looks and tastes divine.
Taste Sensation: With its buttery richness and sweet vanilla notes, it’s a comforting treat that delights the senses. The classic buttercream piping adds a touch of elegance with each bite, providing a soft and creamy texture that complements the fluffy layers.
Why You’ll Love It: This recipe is a perfect blend of creativity and nostalgia. It’s quick to prepare, comforting, and easily customizable. You can jazz it up with different flavors or decorations to create pretty birthday cakes that can fit any personality.
Ingredients

For the Cake:
- 2 cups all-purpose flour
- 1 ¾ cups granulated sugar
- ¾ cup unsalted butter, softened
- 1 cup milk (whole or 2%)
- 2 large eggs
- 2 ½ tsp baking powder
- 1 tsp vanilla extract
- ½ tsp salt
For the Classic Buttercream Piping:
- 1 cup unsalted butter, softened
- 4 cups powdered sugar
- 2-4 tbsp milk (as needed)
- 1 tsp vanilla extract
- Food coloring (optional)
Tools Needed
- Mixing bowls
- Electric mixer or stand mixer
- 9-inch round cake pans
- Parchment paper
- Offset spatula
- Piping bags and decorative tips
- Cooling rack
- Measuring cups and spoons
Suggested Substitutions and Additions
- For a dairy-free option, substitute unsweetened almond milk for regular milk and use dairy-free butter for the buttercream.
- Swap granulated sugar for coconut sugar or a sugar substitute if you’re looking for a low-glycemic alternative.
- Add ½ cup of cocoa powder to the dry ingredients for a chocolate version of the cake.
- Incorporate different flavor extracts, such as almond or lemon, for a unique twist.
How to Make
Step 1: Prepare the Cake Batter
Begin by preheating your oven to 350°F (175°C). In a large mixing bowl, cream together ¾ cup of softened unsalted butter and 1 ¾ cups granulated sugar until light and fluffy—this step is crucial as it introduces air into the batter, ensuring a light and airy texture. Add in the eggs, one at a time, mixing well after each addition. The rich aroma of butter and sugar combined is intoxicating!
Step 2: Combine Dry Ingredients
In another bowl, sift together 2 cups of all-purpose flour, 2 ½ teaspoons of baking powder, and ½ teaspoon of salt. Sifting helps aerate the flour, preventing any lumps and ensuring even distribution of the baking powder, which is critical for the cake’s rise.
Step 3: Mix Wet and Dry Ingredients
Gradually add the dry ingredients to the creamed mixture, alternating with 1 cup of milk and 1 teaspoon of vanilla extract. Mix until just combined, being careful not to overmix. The batter should be smooth, with a lush, creamy texture that glistens in the bowl.
Step 4: Bake the Cake
Divide the batter evenly between the prepared 9-inch round cake pans lined with parchment paper. Smooth the tops with an offset spatula for even baking. Bake for 25-30 minutes or until a toothpick inserted in the center comes out clean. Your kitchen will soon be filled with the sweet, warm essence of vanilla and freshly baked goodness. Allow the cakes to cool in the pans for 10 minutes before transferring them to a cooling rack.
Step 5: Make the Classic Buttercream
While the cakes are cooling, prepare the buttercream frosting. In a large mixing bowl, use an electric mixer to beat 1 cup of softened unsalted butter until creamy. Gradually add 4 cups of powdered sugar, mixing on low speed until combined. Add 2-4 tablespoons of milk for the desired consistency and 1 teaspoon of vanilla extract for flavor. The result is a silky smooth buttercream that is simply irresistible.
Step 6: Assemble and Pipe the Cake
Once the cakes are completely cooled, place one layer on a serving plate. Spread a generous layer of buttercream on top, then gently place the second cake layer on top. Apply a thin crumb coat over the entire cake to seal in any loose crumbs, then refrigerate for about 30 minutes to set. Finally, unleash your creativity with the remaining buttercream, piping it onto the cake to create beautiful, vintage-style decorations that make this birthday cake a true showstopper.
What to Serve with Vintage Style Birthday Cake Recipe with Classic Buttercream Piping
Pair this cake with:
- A scoop of vanilla ice cream or whipped cream to enhance the dessert experience.
- A refreshing fruit salad to balance out the sweetness.
- Sparkling lemonade or a celebratory cocktail for an adult gathering.
If you’re looking for more deliciousness, try my Perfect Chocolate Cupcakes or Lemon Drizzle Cake!
Tips for Making It Perfect
- For a moist cake, be sure not to overmix the batter once you add the flour.
- Don’t skip the crumb coat before the final frosting—it makes a big difference in the visual appeal and overall finish.
- If your buttercream is too runny, add more powdered sugar to thicken; if too thick, a splash of milk will help.
- For a simpler aesthetic, consider a minimalist bday cake by using fewer decorations or opting for a smooth buttercream finish.
Storage Instructions
- Store any leftover cake in an airtight container in the refrigerator for up to 5 days.
- You can freeze the cake layers (wrapped tightly in plastic wrap) for up to 3 months. Thaw before frosting.
- For reheating, use the microwave for a few seconds or enjoy it cold right from the fridge.
General Information
The tradition of decorating birthday cakes traces back to ancient civilizations, where cakes were often shaped into the form of the moon and offered to the gods. Over time, these customs evolved, but one thing remained unchanged: the joy a well-crafted cake brings to celebrations. I fondly recall my grandmother’s kitchen filled with the sounds of laughter and the smell of vanilla as she carefully piped frosting onto her signature cakes. These memories are sweetened by each bite of this cake.
Frequently Asked Questions
- Can I use gluten-free flour in this recipe? Yes, you can substitute with a 1:1 gluten-free flour blend, but the texture may vary slightly.
- How long can I store the cake? The cake can last in the refrigerator for up to 5 days, sealed tightly.
- What if my buttercream is too sweet? Consider adding a pinch of salt or a bit of lemon juice to balance the sweetness.
- Can I substitute the eggs? For a vegan option, use flaxseed meal or a commercial egg replacer.
Conclusion
This Vintage Style Birthday Cake Recipe with Classic Buttercream Piping is more than just a dessert; it’s an invitation to share love, laughter, and memories. Its ease of preparation, alongside the delightful taste and versatile design options, makes it the perfect centerpiece for any birthday celebration. If you loved this recipe, I recommend trying my Strawberry Shortcake or Classic Vanilla Cupcakes next!
Interactive Elements
I would love to hear about your baking adventures! Leave a comment or review below.
Share a photo of your cake on Pinterest
Don’t forget to tag me on Instagram—I can’t wait to see your creations!
Nutritional Information
Here’s the approximate nutritional breakdown per serving (1 slice):
Calories: 350
Protein: 3g
Carbohydrates: 55g
Fat: 15g
Fiber: 1g
Sodium: 180mg
Indulging in this cake is not just about celebrating a birthday; it’s about creating sweet memories that linger long after the last bite. Enjoy, friends!

Emily brings four years of dedicated baking experience and professional pastry-focused training to Moms Meals Daily. She oversees recipe validation and quality control to ensure every dessert performs consistently and reliably.
Vintage Style Birthday Cake Recipe with Classic Buttercream Piping
By Emily Hart
Ingredients
Instructions
Tools Needed
Save this recipe for later ❤️
Follow @mommealsdaily on Pinterest for easy dinners, desserts, and weekly inspiration.
Victoria Recipe | Easy Desserts & Dessert Recipes
Easy & Delicious Recipes
Follow for quick family-friendly recipes, baking inspiration, and comfort food favorites.
Follow on Pinterest