There’s something magical about a dessert that requires no baking but still delivers a blissful explosion of flavors and textures. When I first experimented with the No Bake Almond Joy Icebox Cake, I was transported back to my childhood, where the excitement of the sweet confectionery store was rivaled only by the simple pleasure of enjoying a chocolate and coconut treat. This recipe embodies everything delicious about those classic Almond Joy candies, harmoniously layered into a rich, silky icebox cake that brings comfort and joy in every bite.
Table of Contents
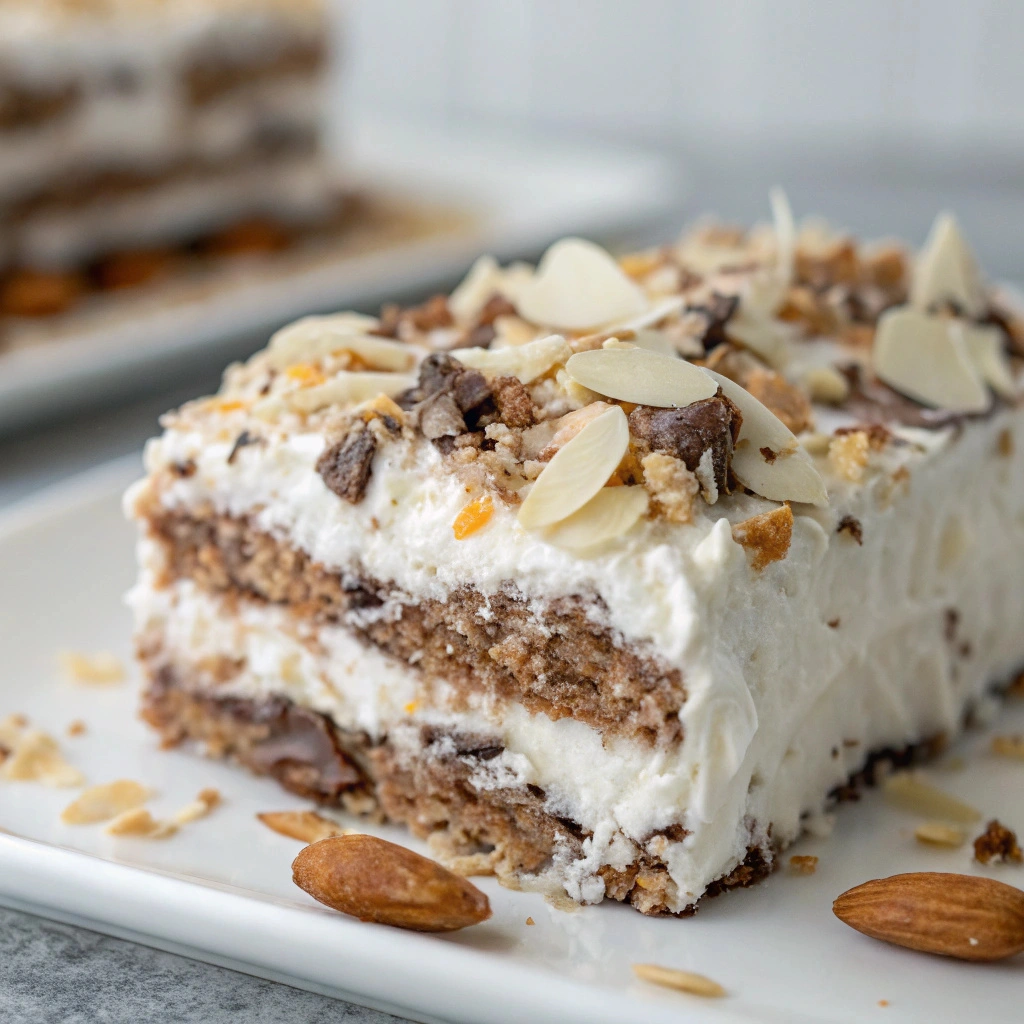
Picture this: a luscious, creamy filling, baked into layers of chocolate cookies, and topped with toasted coconut and crunchy almonds. Each slice melts in your mouth, mingling the deep flavors of chocolate and coconut, with a nutty crunch that gives a satisfying finish. It reminds me of those cozy family gatherings where laughter echoed through the kitchen, and delicious aromas filled the air.
The best part? This No Bake Almond Joy Icebox Cake is incredibly simple and quick to put together, making it an ideal option for any occasion—whether it’s a bake sale, a summer barbecue, or simply a sweet treat to delight your family. It’s perfect for those who appreciate easy desserts with few ingredients but don’t want to skimp on flavor. So, if you love cozy recipes like this, subscribe to my email list!
Overview of Recipe Content
This No Bake Almond Joy Icebox Cake is a straightforward dessert that will leave everyone asking for seconds. It is best served chilled, allowing the luscious filling to set beautifully while maintaining a wonderfully soft texture. Each slice offers the delightful taste of chocolate and coconut, evoking warm feelings of nostalgia.
Readers will adore this recipe for several reasons: it requires minimal effort, is incredibly comforting, and boasts endless customization options to suit varying tastes. Plus, with nuts and coconut, this dessert offers nutritional benefits worth celebrating.
Ingredients

Main Ingredients:
- 2 cups heavy whipping cream
- 1 cup powdered sugar
- 1 teaspoon vanilla extract
- 8 ounces cream cheese, softened
- 1 cup sweetened shredded coconut, toasted
- 1 cup chocolate cookie crumbs (like Oreos)
- 1 cup sliced almonds, lightly toasted
Toppings:
- Extra shredded coconut for garnish
- Chocolate syrup for drizzling
Tools Needed
- Medium mixing bowl
- Electric mixer or whisk
- 9-inch springform pan
- Spatula
- Measuring cups and spoons
- Toaster oven or pan for toasting coconut and almonds
Suggested Substitutions and Additions
The beauty of this recipe lies in its adaptability. Here are some helpful substitutions and variations to consider:
- Dairy-free: Use coconut cream in place of heavy cream and non-dairy cream cheese for a vegan option.
- Nut alternatives: Swap out almonds for walnuts or pecans if you prefer a different crunch.
- Flavor additions: Add a dash of almond extract for an extra nutty flavor or intertwine some cherry preserves for a fruity twist.
- Health-conscious: Use whole grain cookies or sugar substitutes to reduce added sugar.
How to Make
Step 1: Prepare the Filling
Start by combining the softened cream cheese and powdered sugar in a medium mixing bowl. Blend them together until smooth and creamy. The rich aroma of cream cheese will envelop your senses as you mix. Make sure to scrape down the sides to incorporate everything well.
Once it’s smooth, add in the heavy whipping cream and vanilla extract. Whip the mixture on medium speed until soft peaks form. As you beat it, watch as the cream lightens and thickens, creating a cloud-like texture that’s absolutely divine.
Next, gently fold in the toasted shredded coconut into the creamy mixture. Feel free to pause and taste—this layer is rich and fluffy, bursting with coconut goodness!
Step 2: Construct the Cake Layers
Lay down a layer of chocolate cookie crumbs at the bottom of a 9-inch springform pan. Press them firmly to create a solid crust. This initial layer acts as the foundation, anchoring all the other elements. Once pressed, take half of the cream cheese filling and spread it evenly over the crumbs. Picture the delicious creaminess pooling, as you visually build this dessert.
Follow with another layer of chocolate cookie crumbs, followed again by the remaining filling. This alternating process creates a beautiful contrast of color and texture within the cake.
Step 3: Final Assembly
After layering, sprinkle the sliced almonds on top of the final filling layer. The crunch they provide will enhance each bite of this dessert. Wrap your masterpiece in plastic wrap and segue to the refrigerator for at least 4 hours or overnight—this setting time is crucial for melding the flavors and achieving that dreamlike consistency.
During the wait, you can daydream about the delicious treat awaiting you, or invite friends to join you for a cozy chat over coffee.
What to Serve with No Bake Almond Joy Icebox Cake
This delightful No Bake Almond Joy Icebox Cake pairs beautifully with various side dishes and drinks. Here are some suggestions:
- Side Dishes: Fresh fruit, like strawberries or raspberries, adds a delightful tartness that balances the cake’s sweetness.
- Drinks: A cup of brewed coffee is a classic choice, while a chilled glass of almond milk complements the cake perfectly.
- Garnishes: A drizzle of chocolate syrup provides an aesthetic appeal and enhances the sweet treat experience.
Additionally, if you’re seeking more delicious ideas, consider these related recipes:
Tips for Making It Perfect
Here are a few expert tips to ensure your No Bake Almond Joy Icebox Cake turns out perfectly every time:
Prep-ahead: This dessert is best made the day before to give it ample time to set. Just slice and serve for a stress-free treat.
Fixing common mistakes: If your filling seems too runny, ensure your cream cheese is at room temperature and whip the cream until it forms firmer peaks.
Texture adjustments: For a thicker layer, reduce the amount of whipped cream or add more cream cheese to your filling.
Doubling down: This recipe can be easily doubled and stored in a larger pan for dessert parties or bake sales.
Storage Instructions
To keep your No Bake Almond Joy Icebox Cake at its best, consider these storage instructions:
- Refrigerator storage: Store the cake in an airtight container in the fridge for up to 5 days.
- Reheating methods: This dessert is typically served chilled and does not require reheating.
- Make-ahead options: Besides being a great make-ahead option, it can be left in the springform pan as it firms beautifully overnight.
- Freezing recommendations: Although freezing is possible, it may alter the texture slightly. For best results, it’s advisable to enjoy this dessert fresh!
General Information
The concept of icebox cakes has roots in old-fashioned recipes that have been enjoying a renaissance in modern home kitchens. These layered desserts are derived from the necessity of making quick treats using minimal effort—fitting perfectly into today’s fast-paced lifestyle without sacrificing flavor.
In my personal experience, the No Bake Almond Joy Icebox Cake holds a special places in my heart. It’s a delicious reminder that life’s sweetest moments can be created with simple ingredients in a few effortless steps.
Frequently Asked Questions
- What can I substitute for the chocolate cookies? You may use graham crackers or even gluten-free cookies if desired.
- How long can I store this cake? The icebox cake stays fresh for about five days in the refrigerator.
- Why is my filling too soft? Ensure your cream is whipped to the right consistency and that your cream cheese is well-blended without lumps.
- Can I make it without nuts? Absolutely! Feel free to omit the almonds or substitute them with seeds for decoration.
Conclusion
This No Bake Almond Joy Icebox Cake is a heartfelt dessert that beautifully encapsulates the joys of simple, homemade delights. Its ease of preparation, rich flavor profile, and the joy it brings make it a must-try for any dessert lover.
For a delightful finish, consider making my Easy Chocolate Mousse Cups or the Mini Coconut Macaroons alongside this treat! Thank you for spending time in my kitchen with me, and I can’t wait for you to try this recipe!
Interactive Elements
If you try this recipe, I’d love to hear about it! Leave a comment or review below.
Feel free to share a photo of your No Bake Almond Joy Icebox Cake on Pinterest
Tag me on Instagram so that I can see your wonderful creations!
Nutritional Information
Here’s an approximate nutritional breakdown per serving:
- Calories: 310
- Protein: 4g
- Carbohydrates: 27g
- Fat: 22g
- Fiber: 2g
- Sodium: 160mg

Emily brings four years of dedicated baking experience and professional pastry-focused training to Moms Meals Daily. She oversees recipe validation and quality control to ensure every dessert performs consistently and reliably.
No Bake Almond Joy Icebox Cake
By Emily Hart
Ingredients
Instructions
Tools Needed
Save this recipe for later ❤️
Follow @mommealsdaily on Pinterest for easy dinners, desserts, and weekly inspiration.
Victoria Recipe | Easy Desserts & Dessert Recipes
Easy & Delicious Recipes
Follow for quick family-friendly recipes, baking inspiration, and comfort food favorites.
Follow on Pinterest