Thanks for being here! I’m so excited to share my No-Bake Berry Cheesecake Jars with you! This delightful recipe is not only a crowd-pleaser but also an absolute treat for the senses. Layered with creaminess, freshness from mixed berries, and a crumbly base, these mini cheesecakes are bound to become a favorite in your home. They hold a special place in my heart because they remind me of springtime gatherings when flowers bloom and everything feels fresh and alive.
Perfect for Easter or any spring celebration, these No-Bake Berry Cheesecake Jars are quick to prepare and showcase the vibrant colors and flavors of mixed berries. You can whip these up in no time, making them an ideal option for those family get-togethers when you want something light yet indulgent. They’re not just delicious; they’re also a refreshing way to satisfy your sweet tooth while welcoming the warmer months ahead.
Table of Contents
If you love cozy recipes like this, subscribe to my email list!
Overview of Recipe Content
This recipe is a simple yet elegant take on traditional cheesecake, presented in charming little jars. Each jar is filled with a luscious cream cheese filling and topped generously with a variety of mixed berries, creating a beautiful and colorful dessert.
You’ll want to serve these delightful no-bake cheesecakes at spring gatherings, Easter celebrations, or whenever the craving strikes. The taste is a harmonious blend of creamy, sweet, and tangy, complemented by the freshness of the berries.
Readers will love this recipe because it’s quick to prepare, healthy, and incredibly comforting. Plus, there’s something satisfying about enjoying a dessert that looks as good as it tastes. With the spring bounty of fresh berries, this recipe allows you to savor the season. It’s also gluten-free and can be easily adapted for a vegan option, making it a hit for a variety of dietary needs.
Ingredients
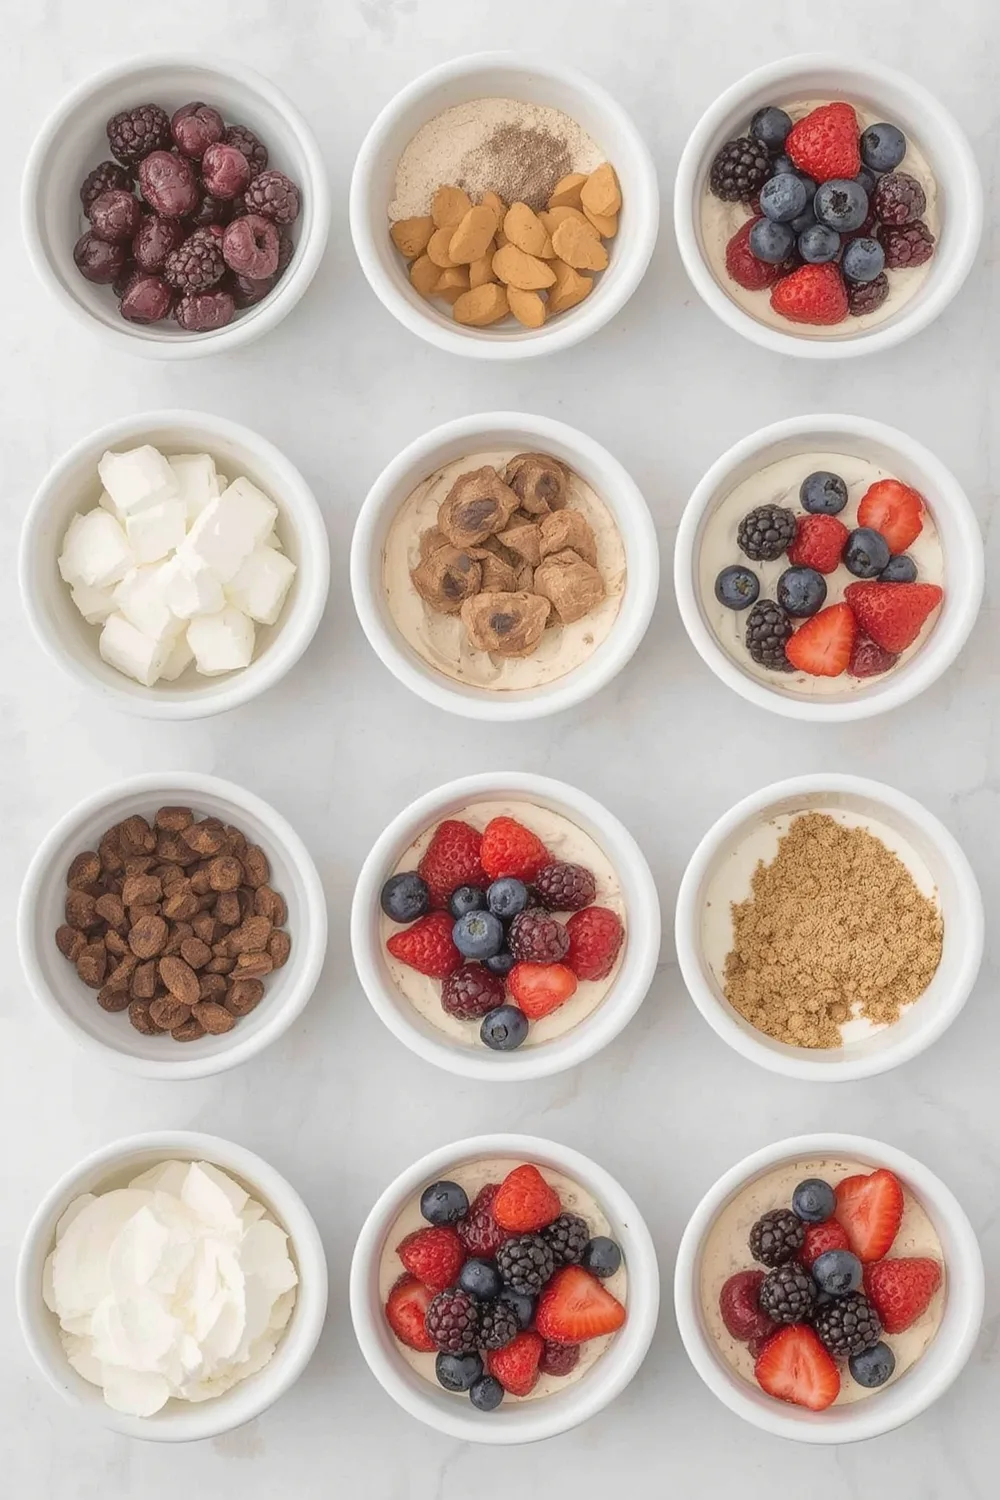
- 1 cup graham cracker crumbs
- 1/4 cup unsalted butter, melted
- 1 cup cream cheese, softened
- 1/2 cup sugar
- 1 tsp vanilla extract
- 1 cup heavy whipping cream
- 2 cups mixed berries (strawberries, blueberries, raspberries)
- Mint leaves for garnish (optional)
Tools Needed
- Mixing bowls
- Electric mixer
- 4-ounce mason jars or dessert jars
- Rubber spatula
- Measuring cups and spoons
- Whisk
Suggested Substitutions and Additions
- Replace graham cracker crumbs with crushed vanilla wafers or almond flour for gluten-free options.
- Use Greek yogurt instead of cream cheese for a lighter version.
- Swap granulated sugar for honey or maple syrup for a natural sweetener.
- Incorporate different fruits such as peaches or cherries for a different flavor profile.
How to Make
Step 1: Prepare the Crust
Start by mixing the graham cracker crumbs and melted butter in a mixing bowl. Stir until the crumbs are evenly coated. You’ll know it’s ready when it has a consistency similar to wet sand.
Next, spoon about two tablespoons of this mixture into the bottom of each mason jar, pressing down gently to create a compact crust.
Step 2: Make the Cream Cheese Filling
In another mixing bowl, combine the softened cream cheese, sugar, and vanilla extract. Using an electric mixer, beat these ingredients together until smooth and creamy. Make sure there are no lumps; the mixture should be light and fluffy.
In another bowl, whip the heavy cream until stiff peaks form. Gently fold the whipped cream into the cream cheese mixture using a rubber spatula. Be careful not to deflate the cream—this will keep the filling airy and delicious!
Step 3: Assemble the Jars
Now comes the fun part! Take your jars and layer the cream cheese filling on top of the graham cracker crust. Use about three tablespoons per jar and smooth the top with a spatula.
Then, it’s time to add the mixed berries! Use a combination of strawberries, blueberries, and raspberries, generously piling them on top of the cream filling. If you want, you can add a few more graham cracker crumbs over the berries for a crunchy finish.
Step 4: Chill and Serve
Cover the jars with their lids or plastic wrap and place them in the refrigerator to chill for at least four hours or overnight. This allows all the flavors to meld beautifully and ensures a perfect texture.
When you’re ready to serve, garnish with a sprig of mint on top for a pop of color and freshness.
What to Serve with No-Bake Berry Cheesecake Jars – Mini cheesecakes topped with mixed berries.
These cheesecakes are delightful all on their own, but you can elevate your dessert table by pairing them with:
- A refreshing mint lemonade
- Chocolate-dipped strawberries
- Vanilla ice cream with a berry sauce
You may also love these related recipes from my blog:
Spring Lemon Tart: A refreshing dessert that cuts through the sweetness of the cheesecake.
Raspberry Almond Scones: Perfect for brunch alongside your cheesecake jars.
Strawberry Rhubarb Crumble: A delicious and fruity option that’s easy to prepare.
Tips for Making It Perfect
Prep Ahead: You can prepare the crust and the cream cheese mixture a day in advance for an even easier assembly.
Avoid Grainy Texture: Make sure your cream cheese is at room temperature to avoid lumps and achieve a creamy texture.
Doubling the Batch: Feel free to double the recipe if you’re serving a crowd. Simply adjust your jar count accordingly.
Experiment with Flavors: Consider adding lemon zest to your cream filling for a bright, citrusy kick or different flavored extracts for variety.
Sturdiness: Ensure your crust is compact enough to hold the filling without crumbling.
Storage Instructions
Store the No-Bake Berry Cheesecake Jars in the refrigerator for up to 5 days. They are best enjoyed fresh, but the flavors continue to develop, making them tasty even a few days later.
If you wish to freeze them, it’s recommended to leave the toppings off and only freeze the cheesecake mixture. Freeze them in airtight containers for up to three months. When you’re ready to enjoy, simply thaw in the refrigerator overnight.
General Information
The idea of cheesecake has an interesting historical background tracing back to ancient Greece, where it was served during the first Olympic Games. Over the years, cheesecake has evolved into numerous forms and varieties across different cultures. My No-Bake Berry Cheesecake Jars are inspired by the classic Italian dessert and bring together the best of both worlds— a light, no-bake approach perfect for warmer months and topped with the seasonal bounty of fresh berries.
Frequently Asked Questions
Can I use low-fat cream cheese?
Yes, low-fat cream cheese works well, but it may make the filling a bit less creamy.
How long can I store the jars in the refrigerator?
You can keep the jars in the fridge for about 5 days; just make sure to keep them covered!
What if my filling turns out too runny?
If your filling is too runny, try chilling it for a longer time, or you can fold in some additional whipped cream to help thicken it up.
Can this recipe be vegan?
Absolutely! You can substitute the cream cheese with a vegan cream cheese alternative and the heavy cream with coconut cream for a delicious vegan version.
Conclusion
The No-Bake Berry Cheesecake Jars are not just a dessert; they are a celebration of spring and a joy to make and share with others. Their light, fluffy texture and the sweet-tart punch of berries make them truly special.
If you’re looking for more delightful recipes, check out my Lemon Tart and Raspberry Almond Scones! Both pair wonderfully with your no-bake cheesecakes.
Until next time, happy baking!
Interactive Elements
I would love to hear your thoughts! Please leave a review or comment below. If you try these jars, share a photo on Pinterest and tag me on Instagram. I can’t wait to see your beautiful creations!
Nutritional Information
Approximate calories and macros per serving (1 jar):
Calories: 320
Fat: 22g
Carbohydrates: 32g
Protein: 5g
Sugar: 18g

Emily brings four years of dedicated baking experience and professional pastry-focused training to Moms Meals Daily. She oversees recipe validation and quality control to ensure every dessert performs consistently and reliably.

No-Bake Berry Cheesecake Jars – Mini cheesecakes topped with mixed berries
By Emily Hart
Ingredients
Instructions
Tools Needed
Save this recipe for later ❤️
Follow @mommealsdaily on Pinterest for easy dinners, desserts, and weekly inspiration.
Victoria Recipe | Easy Desserts & Dessert Recipes
Easy & Delicious Recipes
Follow for quick family-friendly recipes, baking inspiration, and comfort food favorites.
Follow on Pinterest