There’s something magical about creating a dessert that not only satisfies your sweet tooth but also offers a sense of nostalgia. I’m so excited to share this recipe for No Bake Oat Milk Chocolate Pudding Cups with you. The inspiration for this delightful treat comes from my childhood, where I would eagerly watch my grandmother whip up luscious puddings after school. She always had a knack for turning simple ingredients into something extraordinary, and now I find myself carrying on that delicious tradition.
Table of Contents
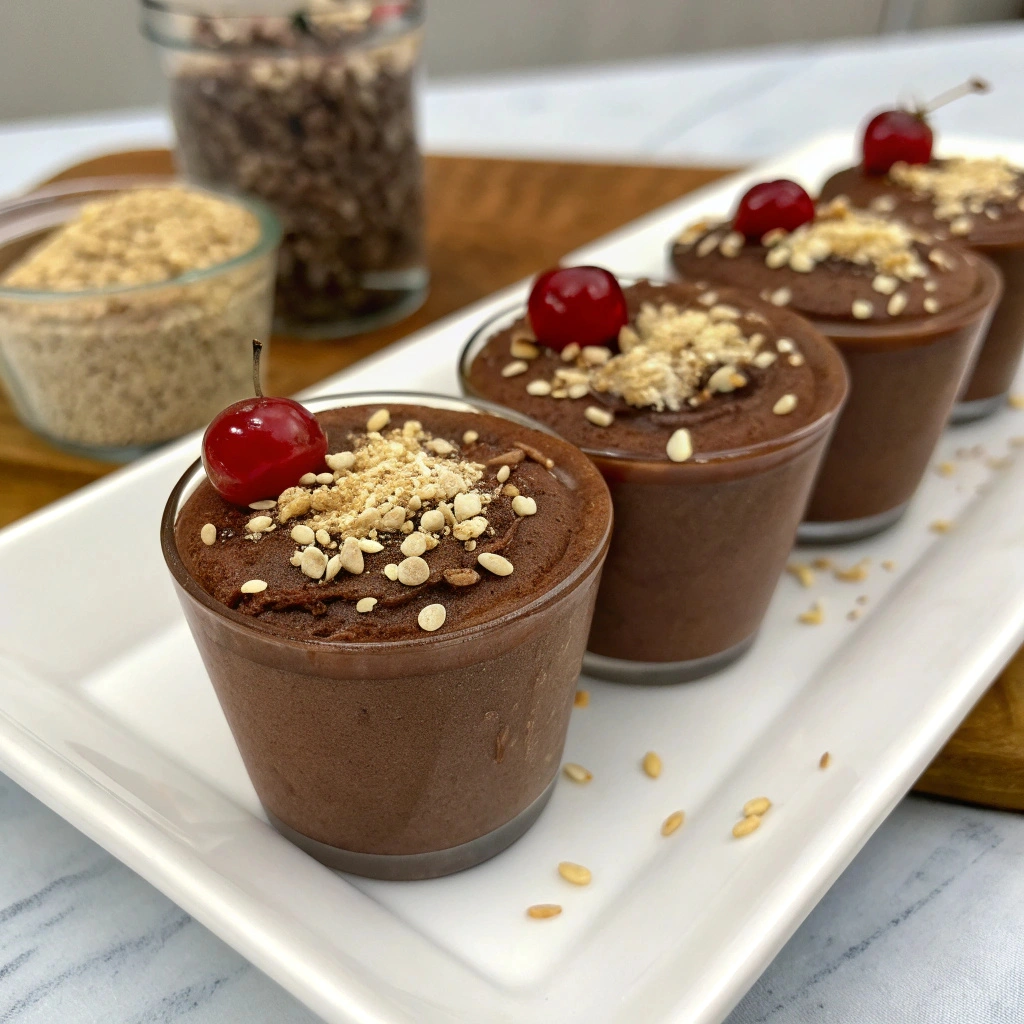
These pudding cups are reminiscent of those cozy afternoons, filled with creamy chocolate goodness that’s as comforting as a warm hug. The creamy texture of the oat milk combined with rich chocolate creates a harmony of flavors that dance on your palate, while the light, airy layers give each spoonful a dreamy quality. What I love most about this recipe is that it’s simple, using just a few ingredients and requiring absolutely no baking. Whether you’re whipping them up for a cozy family dessert or a bake sale idea, these pudding cups are a delightful treat that everyone will enjoy.
So, if you’re ready to dive into a world of rich flavors and creamy textures, stay tuned! If you love cozy recipes like this, subscribe to my email list!
Overview of Recipe Content
The No Bake Oat Milk Chocolate Pudding Cups are a rich, velvety dessert that comes together in just a few simple steps. They are the epitome of easy desserts with few ingredients, making them perfect for any occasion. Best served chilled, they offer a sweet retreat on a warm day or a delightful finish to a family meal.
These pudding cups taste like a dream—think silky chocolate mingling with the subtle, natural sweetness of oat milk. Each spoonful is a celebration of smoothness and flavor that leaves you wanting more. Readers will love how quick and comforting this recipe is, and the fact that it can easily be customized makes it a crowd-pleaser. Plus, you get the added benefit of plant-based goodness if you’re looking for a dairy-free alternative.
Ingredients

To create these delightful No Bake Oat Milk Chocolate Pudding Cups, here’s what you will need:
Pudding:
- 1 ½ cups oat milk
- ½ cup unsweetened cocoa powder
- ½ cup maple syrup
- 3 tablespoons cornstarch
- 1 teaspoon vanilla extract
- Pinch of salt
Toppings:
- Whipped coconut cream (optional)
- Fresh berries (optional)
- Dark chocolate shavings (optional)
Tools Needed
To get started with these pudding cups, gather the following kitchen tools:
- Medium saucepan
- Whisk
- Mixing bowl
- Measuring cups and spoons
- Serving cups or jars
- Rubber spatula
- Refrigerator
Suggested Substitutions and Additions
To make this recipe customizable, consider the following substitutions and additions:
Dietary Swaps:
- For a vegan option, ensure your whipped topping is dairy-free, or use a homemade coconut cream topping.
- If you require a gluten-free option, this recipe is naturally gluten-free as oat milk is made from gluten-free oats.
Ingredient Alternatives:
- Feel free to use almond milk or soy milk instead of oat milk for different flavor profiles.
- If you prefer, honey can replace maple syrup, although this will no longer be vegan.
Flavor Additions:
- Add a pinch of cinnamon or espresso powder to enhance the chocolate flavor.
- Fold in a tablespoon of almond butter or peanut butter for an extra creamy texture and nutty taste.
How to Make No Bake Oat Milk Chocolate Pudding Cups
Step 1: Prepare the Base
Start by combining your oat milk, cocoa powder, maple syrup, cornstarch, and salt in a medium saucepan. The rich aroma of cocoa will fill your kitchen as you whisk everything together until it is well combined and smooth. It’s crucial to whisk thoroughly to avoid any lumps later on.
Step 2: Cook the Mixture
Place the saucepan over medium heat and continue to stir consistently. As you do this, you may notice the mixture begins to thicken—this can take about 5-8 minutes. The color will darken, and soon enough, it will transform into a luscious pudding-like texture. Remove it from the heat once it reaches your desired consistency.
Step 3: Add Flavor
Now, remove the saucepan from the heat and stir in your vanilla extract. The warmth of the mixture will help release the fragrant notes of vanilla, enhancing the overall flavor profile of your pudding.
Step 4: Chill the Pudding
Transfer the pudding into a mixing bowl and let it cool to room temperature, then cover it with plastic wrap, pressing it directly onto the surface of the pudding to prevent a skin from forming. Place it in the refrigerator for at least an hour to set properly.
Step 5: Assemble the Cups
Once chilled, it’s time to assemble your pudding cups. Spoon the silky pudding into your serving cups or jars, layering them for an eye-catching presentation. Feel free to get creative here!
Step 6: Add Toppings
Top your pudding cups with a dollop of whipped coconut cream and sprinkle fresh berries or dark chocolate shavings for a touch of elegance and flavor complexity. This last step adds an enticing visual appeal and a burst of freshness that complements the richness of the pudding.
What to Serve with No Bake Oat Milk Chocolate Pudding Cups
These No Bake Oat Milk Chocolate Pudding Cups pair perfectly with a variety of accompaniments:
- For a light and refreshing side, consider serving with sliced strawberries or a citrus salad.
- A glass of sparkling water or a non-alcoholic chocolate soda can elevate the dessert experience.
- For garnishes, consider fresh mint leaves or crushed nuts for added crunch.
Related Recipes:
Tips for Making It Perfect
To ensure your pudding cups come out beautifully every time, keep these tips in mind:
- Prep-Ahead Advice: These pudding cups can be made a day in advance, making them a great option for gatherings or as weeknight desserts.
- Fix Common Mistakes: If your pudding turns out too runny, return it to the stove and let it simmer a bit longer to thicken. Remember to keep stirring!
- Texture Adjustments: For a creamier texture, blend the pudding with a hand mixer after cooling.
- Doubling the Recipe: If you’re serving a crowd, feel free to double the recipe and prepare in a large bowl; then portion into jars.
Storage Instructions
Storing these pudding cups is simple:
- Refrigerator Storage: Keep them covered in the refrigerator for up to 4 days. They can be consumed straight from the fridge for a cool snack.
- Reheating Methods: Since this is a no-bake dessert, it’s best enjoyed chilled. However, you can lightly warm it in the microwave for a few seconds if you prefer a warm treat.
- Make-Ahead Options: Prepare the pudding and store it for up to 2 days in advance of when you’d like to serve it.
- Freezing Recommendations: Unfortunately, this pudding does not freeze well due to its creamy texture.
General Information
The origin of pudding can be traced back centuries, with variations found in many cultures around the world, from British bread puddings to American custards. My personal connection to pudding has always been tied to family gatherings, where laughter and love were shared over dessert, reminding me of simpler times filled with warmth. That’s what inspired this no-bake version – a blend of ease, nostalgia, and accessibility for everyone to enjoy.
Frequently Asked Questions
- Can I swap oat milk for something else?
Of course! Almond milk, soy milk, or cashew milk work well in place of oat milk if you’re looking for an alternative.
- How long can I store these pudding cups?
These pudding cups can be stored in the refrigerator for up to 4 days.
- What should I do if my pudding doesn’t thicken?
If your pudding doesn’t thicken, return it to the heat and let it cook longer, stirring frequently until you achieve the right consistency.
- Can I make this recipe gluten-free?
Yes! Ensure you’re using gluten-free oat milk or almond milk to keep it gluten-free.
Conclusion
Recap why this recipe is special. The No Bake Oat Milk Chocolate Pudding Cups are a delightful combination of smooth chocolate flavor and comforting oats. Not only are they rich in taste, but they also offer ease of preparation, making them perfect for anyone looking for simple desserts without the fuss of baking.
If you enjoyed this recipe, I recommend trying my Almond Joy Energy Bites and Coconut Avocado Chocolate Mousse for more delicious treats to share with family and friends.
Thank you for spending this time with me in the kitchen! There’s nothing quite like making memories through food, and I hope you create some lovely moments with these pudding cups.
Interactive Elements
I invite you to share your thoughts! Leave a comment or review below to let me know how your pudding cups turned out. Don’t forget to share a photo on Pinterest and tag me on Instagram—I’d love to see your creations!
Nutritional Information
Here’s a quick look at the approximate nutritional values per serving:
Calories: 180
Protein: 3g
Carbohydrates: 26g
Fat: 6g
Fiber: 3g
Sodium: 80mg

Emily brings four years of dedicated baking experience and professional pastry-focused training to Moms Meals Daily. She oversees recipe validation and quality control to ensure every dessert performs consistently and reliably.
No Bake Oat Milk Chocolate Pudding Cups
By Emily Hart
Ingredients
Instructions
Tools Needed
Save this recipe for later ❤️
Follow @mommealsdaily on Pinterest for easy dinners, desserts, and weekly inspiration.
Victoria Recipe | Easy Desserts & Dessert Recipes
Easy & Delicious Recipes
Follow for quick family-friendly recipes, baking inspiration, and comfort food favorites.
Follow on Pinterest