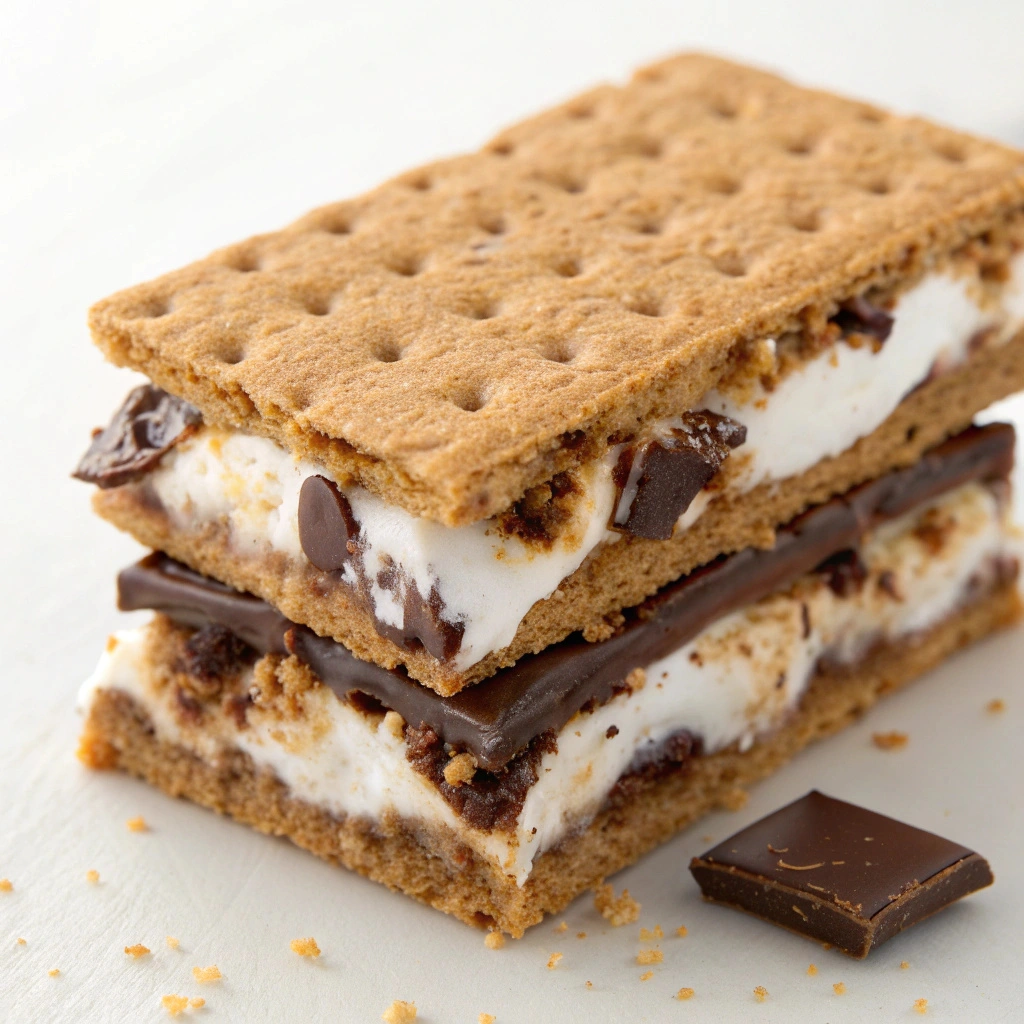
There’s something magical about the first bite of a s’more, isn’t there? The soft, gooey marshmallow melting into silky chocolate, all sandwiched between two crunchy graham crackers—pure bliss! Today, I’m so excited to share my No Bake S’mores Bars with you. This recipe perfectly captures all the divine flavors of traditional s’mores without any of the hassle of a fire pit or an oven.
Table of Contents
My love for s’mores runs deep, tracing back to childhood camping trips under a starlit sky. Those nights filled with laughter, sticky fingers, and warm treats are etched in my memory. As a chef and storyteller, I strive to recreate that comforting, nostalgic experience in my kitchen. These bars bring those cozy, campfire vibes right to your home, no flames required!
With their layered textures and rich flavors, these bars quickly become a favorite for gatherings, bake sales, and even just a cozy night in. If you’re hungry for an effortless way to enjoy this beloved treat, keep reading. I promise you won’t be disappointed! If you love cozy recipes like this, subscribe to my email list!
Overview of Recipe Content
No Bake S’mores Bars are the perfect treat for any occasion. Ideal for summer barbecues, family picnics, or simply a sweet dessert after dinner, these bars replicate the quintessential s’more experience without any baking involved. They are rich, sweet, and decadently satisfying, with a yummy crunch from the graham crackers, followed by a smooth, velvety chocolate layer, and a delightful fluffy marshmallow topping.
You will love these bars for their quick preparation time and minimal ingredients, making them great for last-minute dessert needs. Not only that, but they are a crowd-pleaser, customizable, and can be made ahead of time. Plus, they’re a nostalgic nod to the classic campfire treat, merging old traditions with new, easy methods.
Ingredients

- For the Base:
- 2 cups graham cracker crumbs
- ½ cup salted butter (melted)
- ⅓ cup granulated sugar
- For the Middle Layer:
- 1 cup semi-sweet chocolate chips
- ½ cup heavy cream
- For the Topping:
- 3 cups mini marshmallows
- ½ cup chocolate chips (for drizzling)
Tools Needed
- Mixing bowls
- 9×9 inch baking dish
- Parchment paper (for easy removal)
- Double boiler or microwave-safe bowl
- Rubber spatula
- Measuring cups and spoons
Suggested Substitutions and Additions
- Dietary swaps:
- Use gluten-free graham crackers for a gluten-free version.
- Substitute dairy-free chocolate chips and coconut cream for a vegan-friendly treat.
- Ingredient alternatives:
- Swap out the semi-sweet chocolate for milk chocolate or dark chocolate, depending on your sweetness preference.
- Flavor additions:
- Add a pinch of sea salt on top for a delightful contrast.
- Consider incorporating flavored extracts, like vanilla or almond, to give your bars an extra layer of flavor.
How to Make
Step 1: Prepare the Base
Start by mixing the graham cracker crumbs, melted butter, and granulated sugar in a large mixing bowl until combined. It should resemble wet sand—soft and pliable, yet crumbly enough to hold its shape. The buttery scent mixed with the sweet graham gives a nostalgic feel right from the start. Lightly press this mixture into the bottom of a 9×9 inch baking dish lined with parchment paper for easy removal later. Make sure to pack it firmly; this will be the sturdy base for your bars.
Step 2: Create the Chocolate Layer
Next, it’s time to create that luscious chocolate layer. Set up a double boiler or use a microwave-safe bowl. Heat the heavy cream until it’s steaming, but not boiling. Pour the hot cream over the chocolate chips and let the mixture sit for a minute to allow the chocolate to soften. Stir until smooth and glossy with a rubber spatula. This velvety blend is where the magic happens, bringing richness to each bite.
Pour this decadent chocolate mix over your prepared graham cracker base and spread it evenly. Pop the dish in the refrigerator for about 15 minutes to allow the chocolate to set slightly.
Step 3: Top with Marshmallows
Once the chocolate layer is set, it’s time to get fluffy. Evenly spread the mini marshmallows over the chocolate layer, creating a delightful cloud of sweetness that will add texture and flavor. If you’re feeling adventurous, you can even toast the marshmallows lightly with a kitchen torch for that campfire flavor.
Lastly, sprinkle the top with extra chocolate chips for that rich finish. Refrigerate until the marshmallows are firm, about 30 minutes.
What to Serve with No Bake S’mores Bars
These No Bake S’mores Bars are fantastic on their own, but to elevate your snacking experience, you might consider pairing them with:
- A scoop of vanilla ice cream for a delicious contrast.
- A refreshing iced tea or lemonade to cut the sweetness.
- A drizzle of chocolate or caramel sauce on top for an extra special touch.
For more dessert inspiration, try my Easy Chocolate Chip Cookies or indulge in an Easy No Bake Cheesecake.
Tips for Making It Perfect
- Use room temperature ingredients for better mixing.
- When pressing the graham cracker mixture, use a flat-bottomed measuring cup to create an even surface.
- If you are in a hurry, pop the bars in the freezer to speed up the setting process.
- Consider chopping some nuts or adding peanut butter to the chocolate layer for an alternative twist.
- Always measure your ingredients carefully, especially the graham cracker crumbs, for a perfect texture.
Storage Instructions
To enjoy your No Bake S’mores Bars beyond your initial creation:
- Place them in an airtight container in the refrigerator for up to 5 days.
- If you want to make them ahead, prepare them up to 1 day in advance.
- For even longer storage, you can freeze the uncut bars. Wrap them tightly in plastic wrap and follow with foil. They should last for about 2 months.
General Information
The history of s’mores dates back to the early 20th century. Initially made as simple campfire treats, they have evolved into a beloved symbol of summer and nostalgia. Camping trips and family gatherings often bring to mind the joy of making s’mores around a flickering fire. This No Bake S’mores Bars recipe maintains the spirit of s’mores while making them more accessible to everyone.
Frequently Asked Questions
- Can I swap out the graham crackers for another type?
Yes! You can use crushed cookies like Digestives or Oreos for a different flavor profile.
- How long can I store these bars?
In the refrigerator, they are best within five days, but can be frozen for up to two months.
- What if the texture of the bars is too soft?
Ensure that you let the chocolate layer set properly in the fridge and consider increasing graham cracker crumbs in the base for more structure.
Conclusion
No Bake S’mores Bars are truly special—a delightful mix of nostalgia, flavor, and effortless preparation. They’re great for gatherings or simply indulging on your own. Easy to customize and prepare, they encapsulate the comforting essence of tradition with a modern twist. If you enjoyed this treat, you might also love my Easy No Bake Peanut Butter Treats.
Thank you for joining me on this sweet journey! Happy snacking!
Interactive Elements
I would love to hear your feedback! Please leave a comment or review. If you make these bars, share a photo on Pinterest and tag me on Instagram!
Nutritional Information
Approximate values per serving (based on 16 servings):
Calories: 210
Protein: 2g
Carbohydrates: 30g
Fat: 10g
Fiber: 1g
Sodium: 110mg

Emily brings four years of dedicated baking experience and professional pastry-focused training to Moms Meals Daily. She oversees recipe validation and quality control to ensure every dessert performs consistently and reliably.
No Bake S’mores Bars
By Emily Hart
Ingredients
Instructions
Tools Needed
Save this recipe for later ❤️
Follow @mommealsdaily on Pinterest for easy dinners, desserts, and weekly inspiration.
Victoria Recipe | Easy Desserts & Dessert Recipes
Easy & Delicious Recipes
Follow for quick family-friendly recipes, baking inspiration, and comfort food favorites.
Follow on Pinterest